Secure Boot is a technology that ensures only trusted software launches with Windows as your PC turns on and loads in. It’s important to help keep your PC safe, and it’s required when upgrading to Windows 11. It’s also enabled by default on newer laptops and PCs running Windows 11. However, if you have a PC with Secure Boot disabled for whatever reason, you can easily re-enable it.
This can allow you to install Windows 11 if you haven’t done so already, or if you have, it’s also important to help reduce the risk to your PC. To enable Secure Boot, you’ll need to go to your computer’s BIOS, which looks slightly different on every PC. However, most of the general steps are similar. Let’s take a look at how to find and enable this setting.
How to check if Secure Boot is enabled
If you want to see if Secure Boot is enabled on your PC, fortunately, you don’t have to go into the BIOS to do that. Simply follow the steps below.
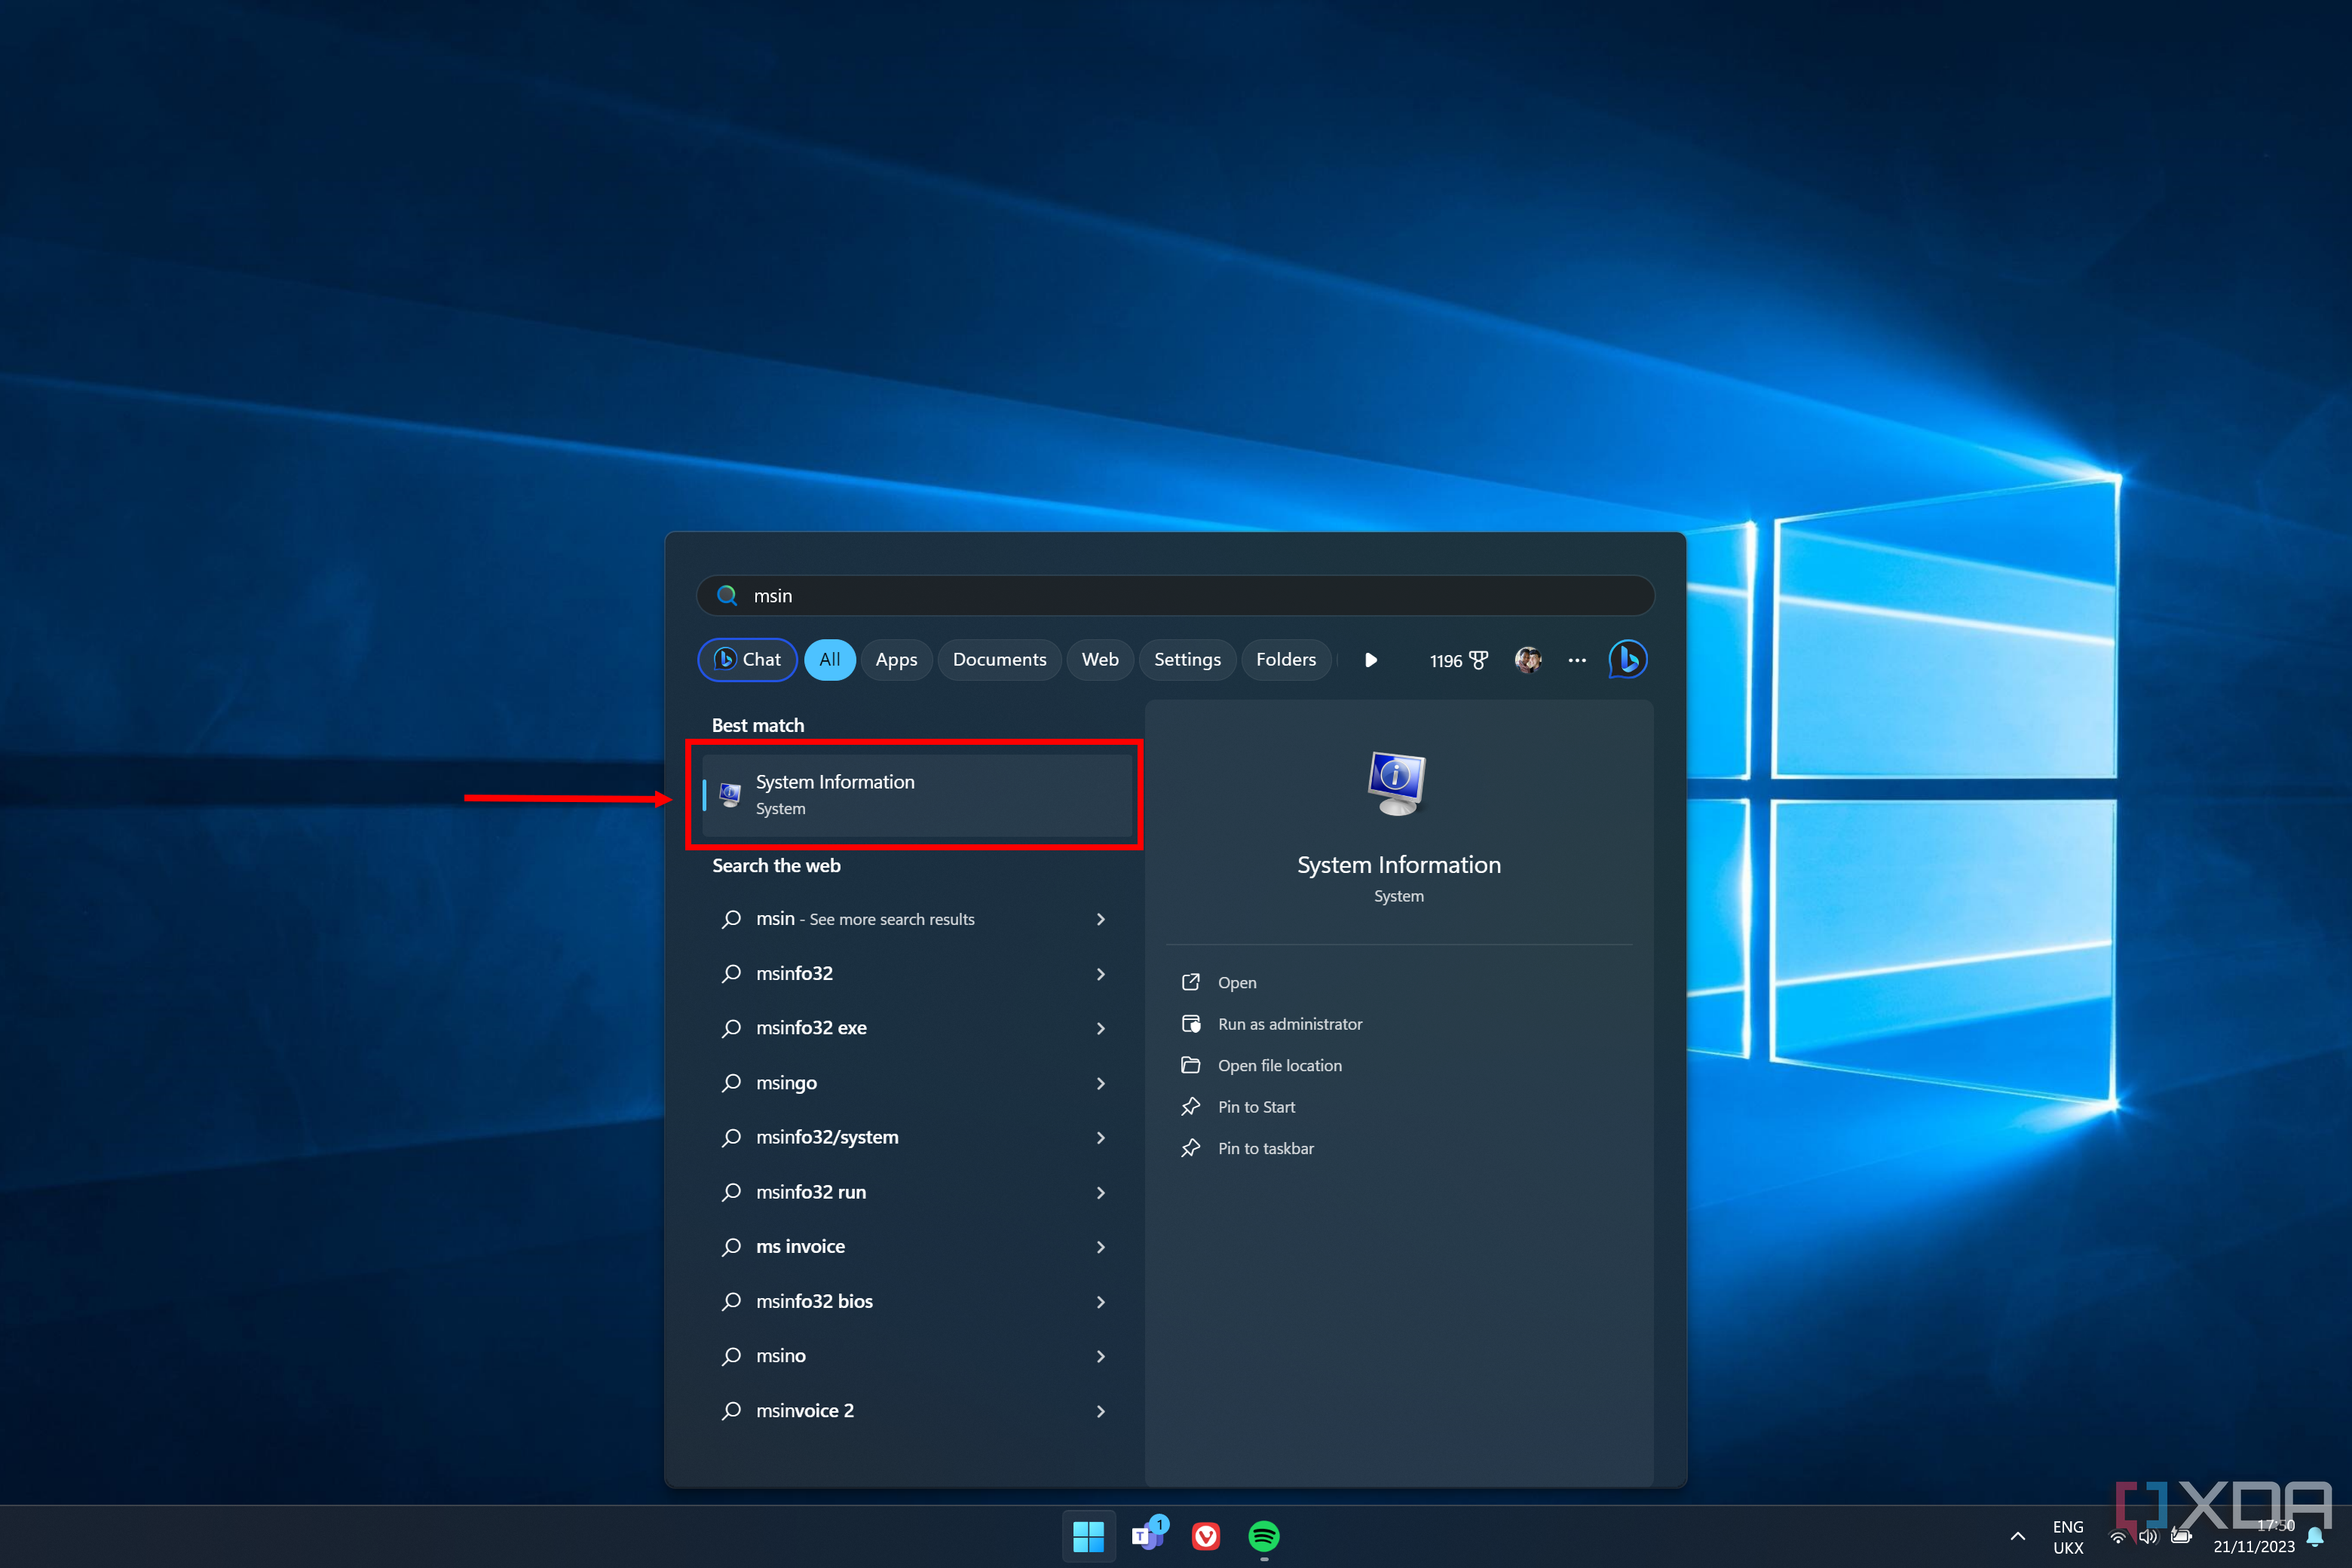
- Open the Start menu and type msinfo32 (or System information).
-
Check to make sure that the Secure Boot State field is set to On. If it is set to Off, then keep reading to follow the steps below and enable it.

How to enable Secure Boot in Windows 11
The steps needed to enable Secure Boot will vary depending on what PC/laptop you use, because every BIOS is slightly different. But the steps inside Windows are all the same, and even the BIOS settings are fairly similar between PCs.
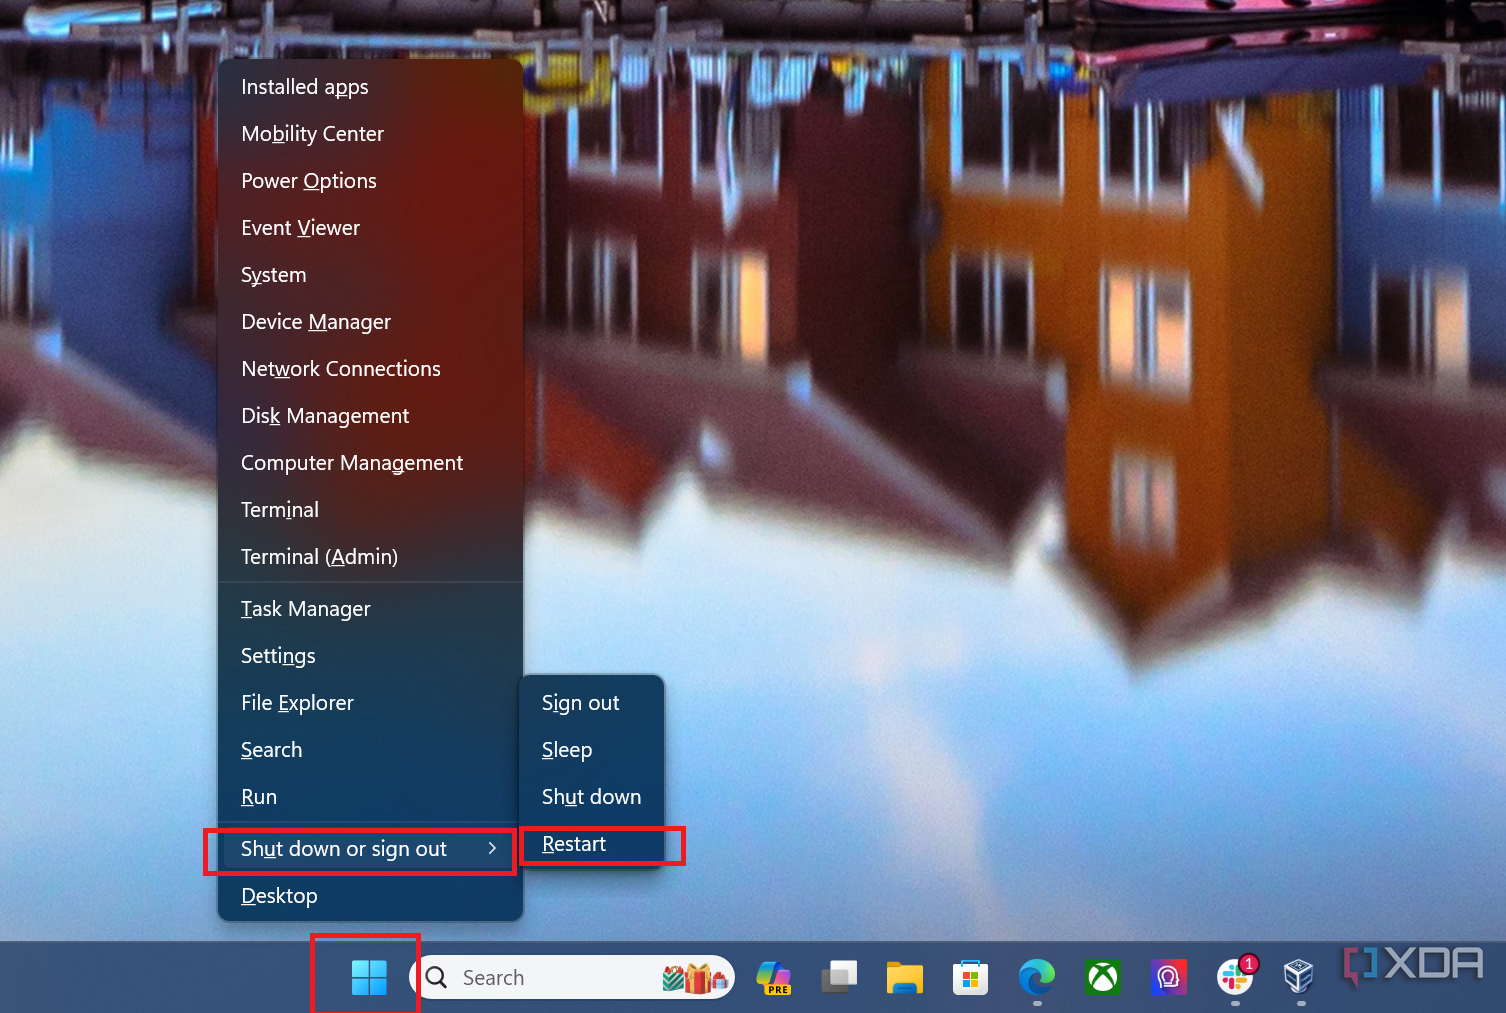
- Open the Start Menu.
-
While holding down Shift on your keyboard, click on the Power icon and then Restart.

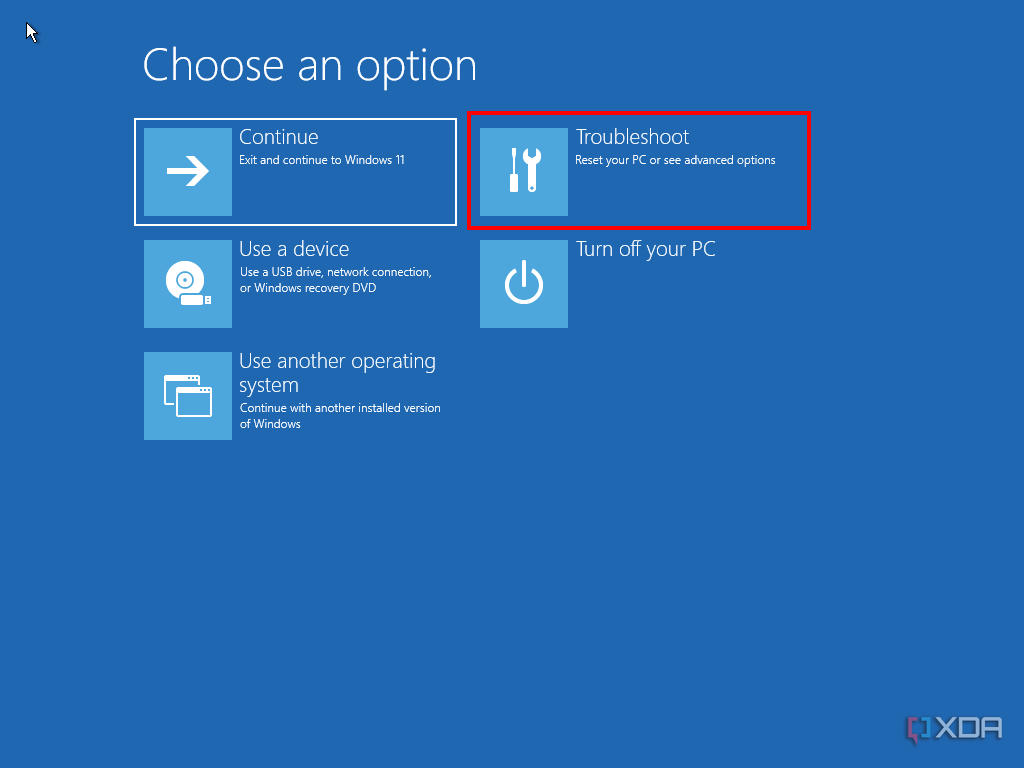
- When your computer restarts, click Troubleshoot.
-
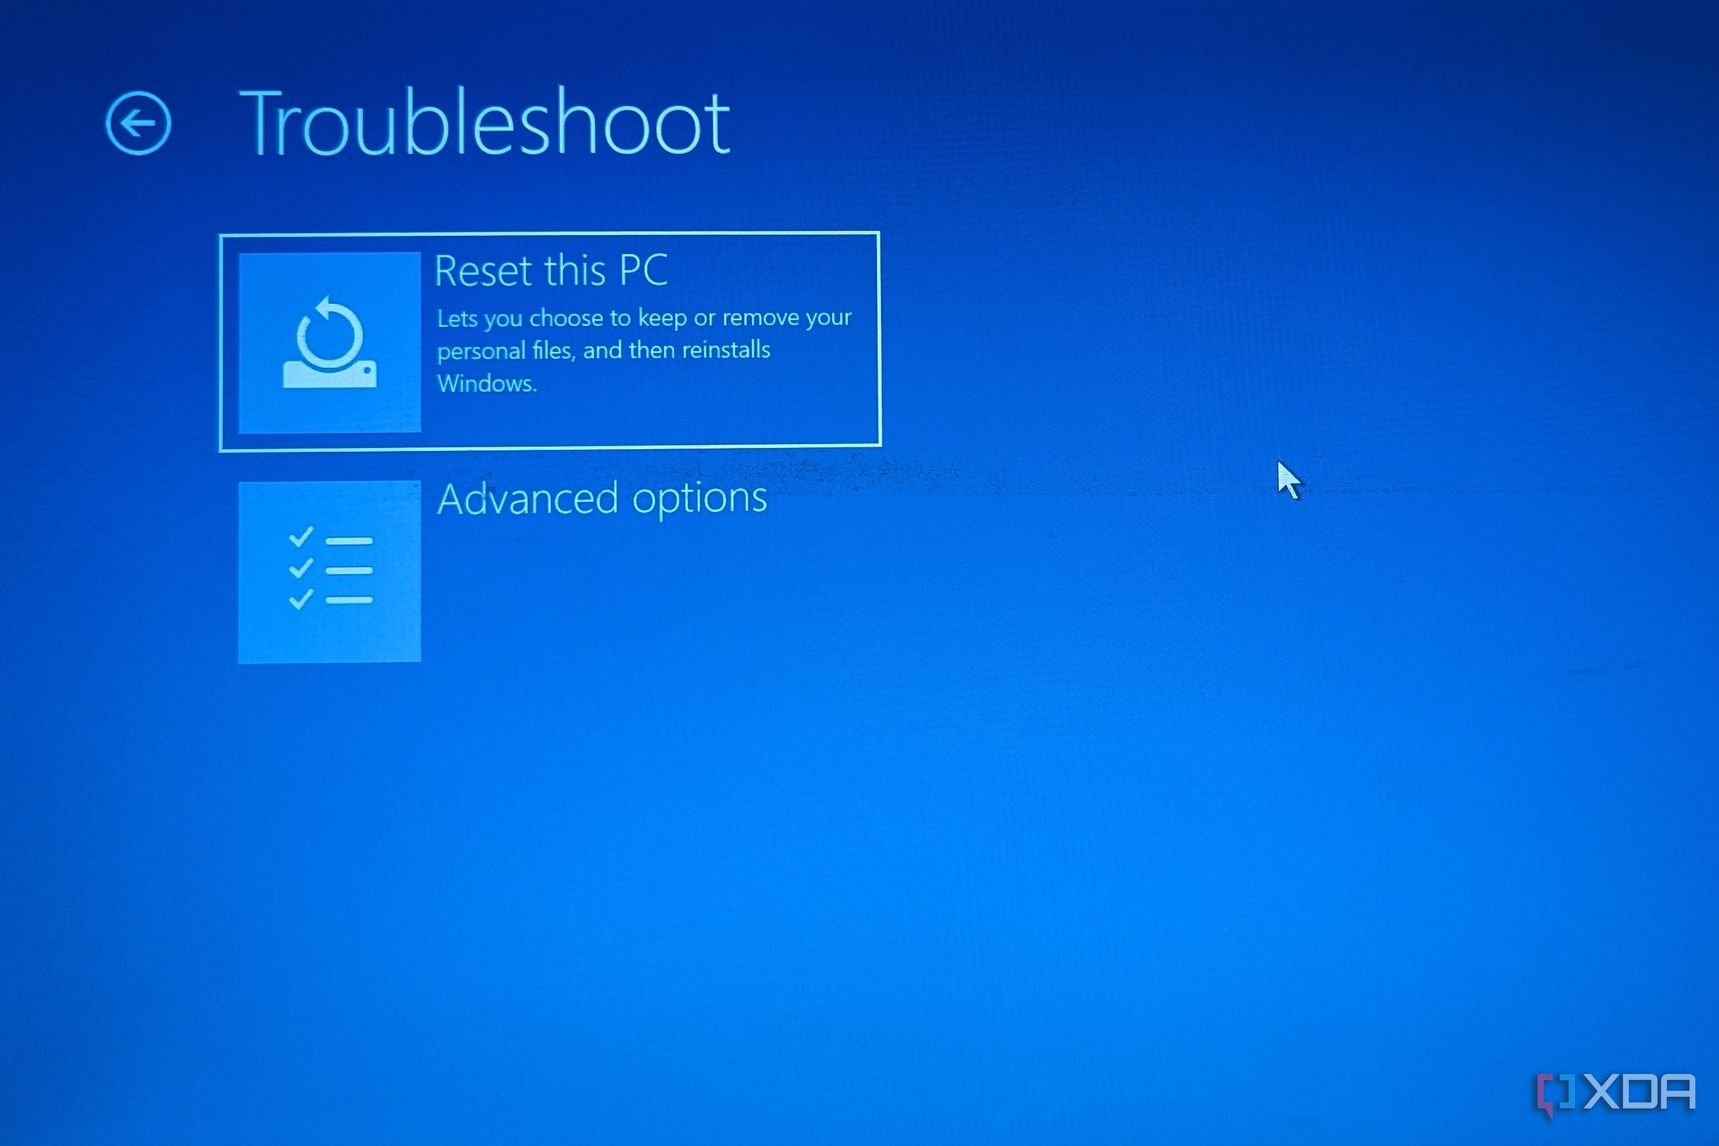
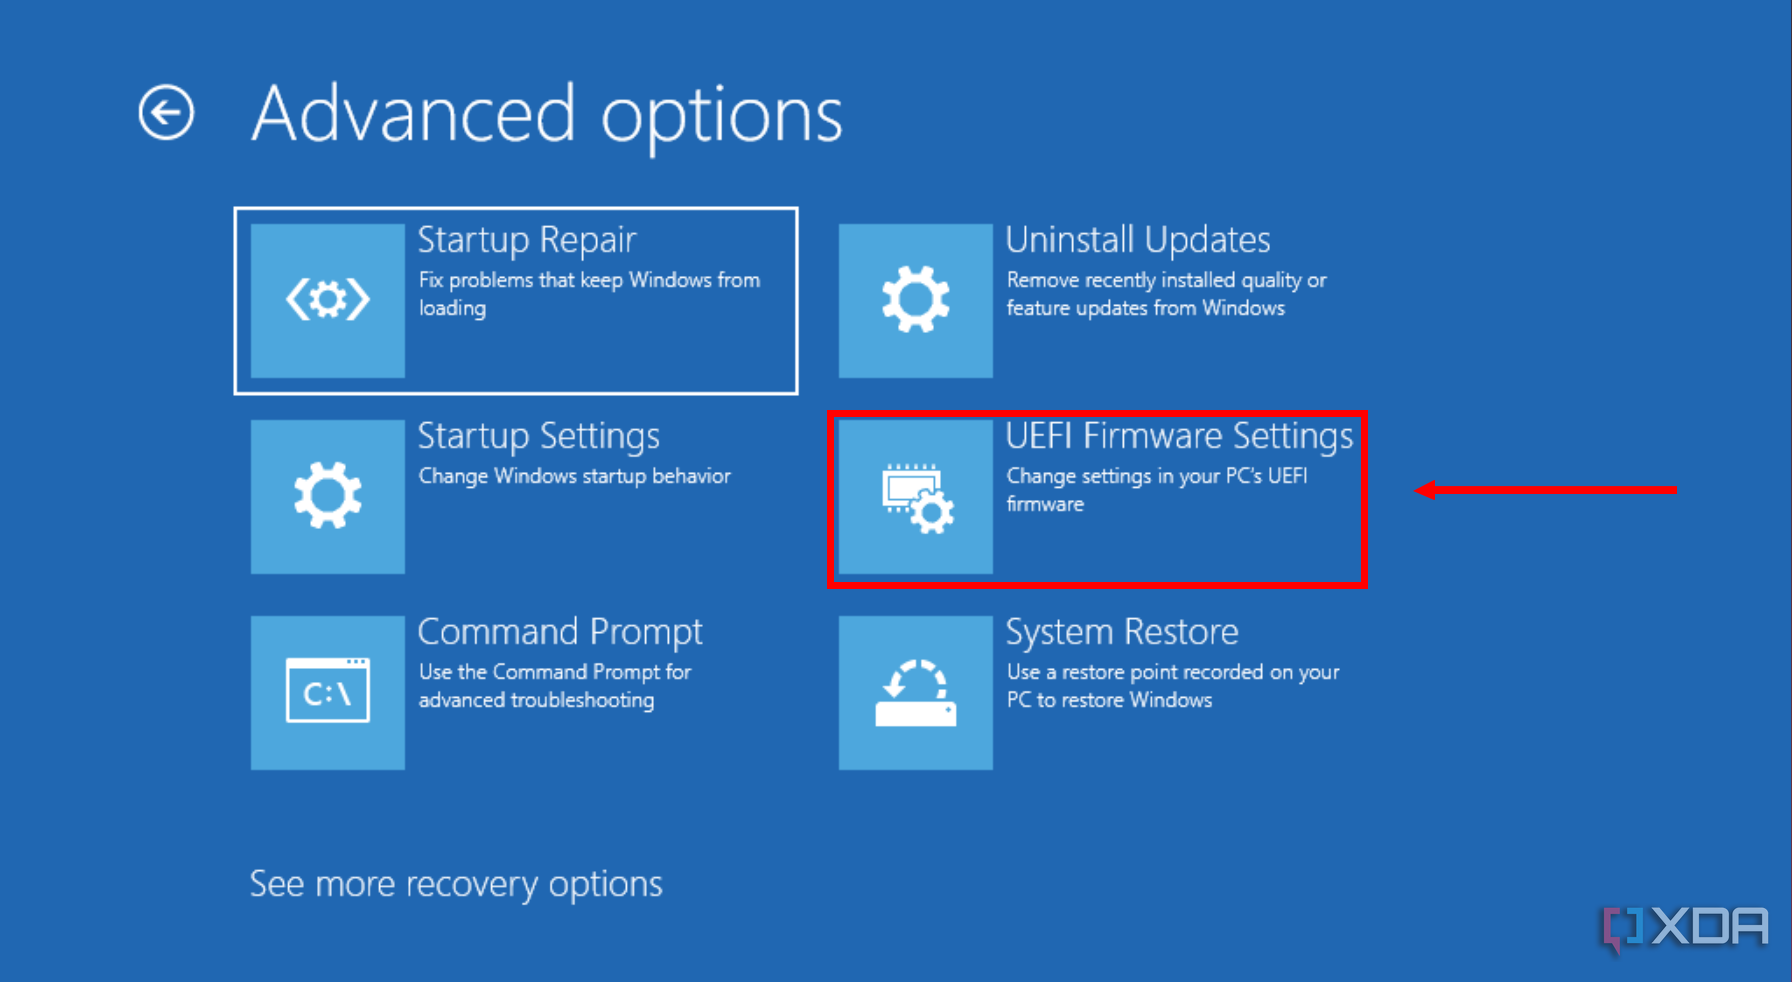
Choose Advanced options.
- Click UEFI Firmware settings and then Restart.
- Look for a Boot option or Security tab to find the Secure Boot option.
-
Select Secure Boot and set it to Enabled or On, if it’s not already.
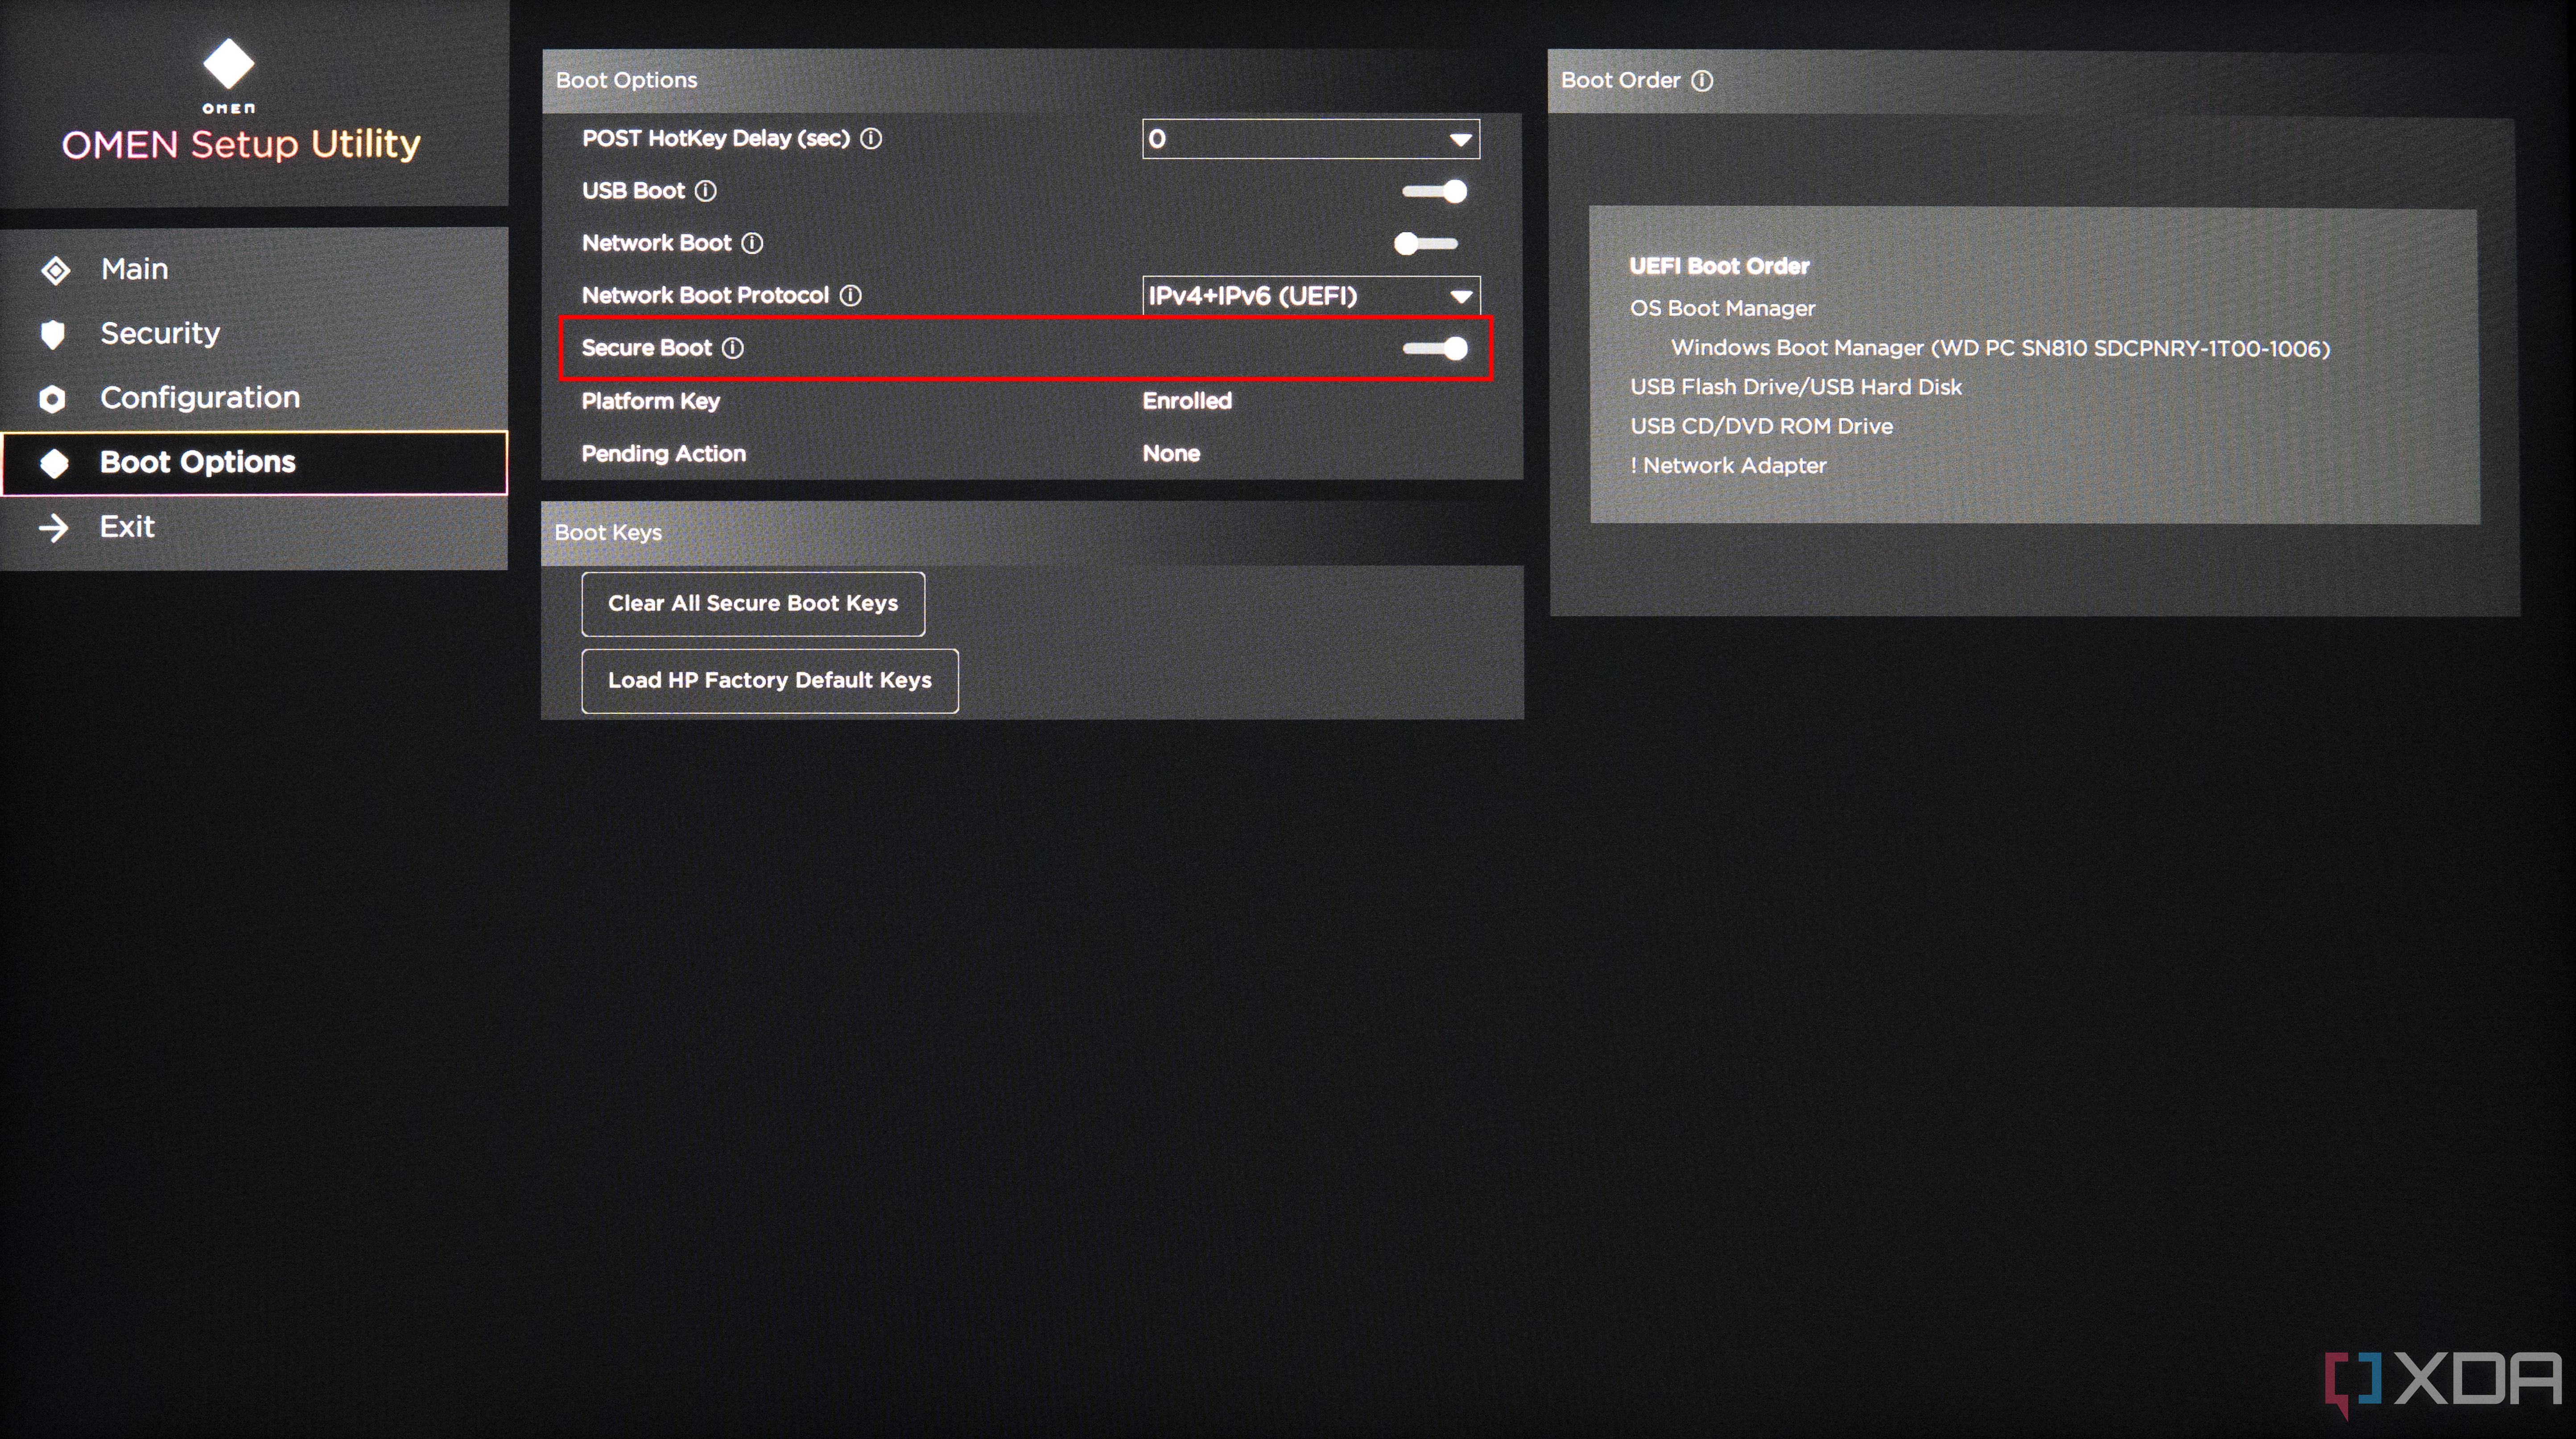
If you want to disable Secure Boot, you can simply follow the steps above but set the option to Disabled or Off instead.
Why should you enable Secure Boot on Windows 11?
Secure Boot is an important security feature that most modern computers have in place for our own good. It was developed by the UEFI Consortium, which includes many of the biggest PC technology companies in the world. Secure Boot ensures that only trusted and verified code can run when your computer starts up, meaning no other software can be injected into the boot process, potentially compromising your PC’s security.
Using digital signatures, Secure Boot can ensure that any software that starts on boot is authentic, from a trusted source, and not corrupted. This helps prevent more sophisticated attacks that could inject malicious code into the boot process. Disabling Secure Boot can be useful if you want to dual-boot Windows 11 with certain Linux distributions, but some of the most popular ones actually support it, so keeping it enabled is generally better regardless.

Related
Qualcomm Maintains its Dedication to Security with Secure Boot
Qualcomm has detailed their own secure boot process in an effort to demonstrate to their partners and customers their dedication to security.


