The sale season has started in India and many of you might have plans to buy a new PC or a laptop. Whether a computer or a smartphone, data is one of the most important assets which users don’t want to lose. But sometimes situations may get out of control and you have to completely wipe your system clean in order to get your computer system running. Users require a system formatting or cleaning because of the following reasons:
- Your PC isn’t working well after you recently installed a Windows update
- Your PC is compromised because of viruses or malwares
- Your PC won’t boot to Windows OS because of recent drivers installed or an accidental system file deleted by you.
- You want to reinstall your stable version of OS
Well there are several methods where you can fix the damage by reverting the changes. Few methods can include going back to a restore point you have created, installing a fresh windows OS using an installation media, resetting your PC or just by simply uninstalling the troublemaking app or an update.
But today in this article I will be covering the topic of recovering your PC using a recovery drive you have created earlier.
What is a recovery drive or media?
A recovery drive is simply an external media such as an external hard disk drive, a USB or a DVD in which you have taken a snapshot of your computer OS system. A recovery drive may come extremely helpful in case you want to restore your system to an early known stage. However recovery drives don’t contain your personal files, settings or programs. So it is always advisable to backup your files frequently.
Why is a recovery drive useful for you?
- A recovery drive lets you restore your PC to a stable version even if your system is not connected to the internet.
- Since you have created a recovery drive manually, you know that this is the best stable snapshot of your PC.
Before you proceed:
- Backup all your personal files and folder to an external hard disk.
- You need a dedicated blank external media in which you are creating the system snapshot. Once you are done creating the backup, you must not alter the contents by adding into or deleting any files from the recovery media. In simple words, you can use this external media for PC recovery only, unless formatted completely.
- Also if you’ve encrypted your device, you’ll need your BitLocker key to use a recovery drive to restore or reset your PC.
A system is in best stable condition when it is new. So if you have recently bought a new laptop or have installed a fresh version of Windows OS in a newly assembled PC, it is the best time to create a recovery drive. And because your system is a modern PC, we will be covering backup and restore options in the latest Windows 10 OS.
How to create a recovery drive in Windows 10?
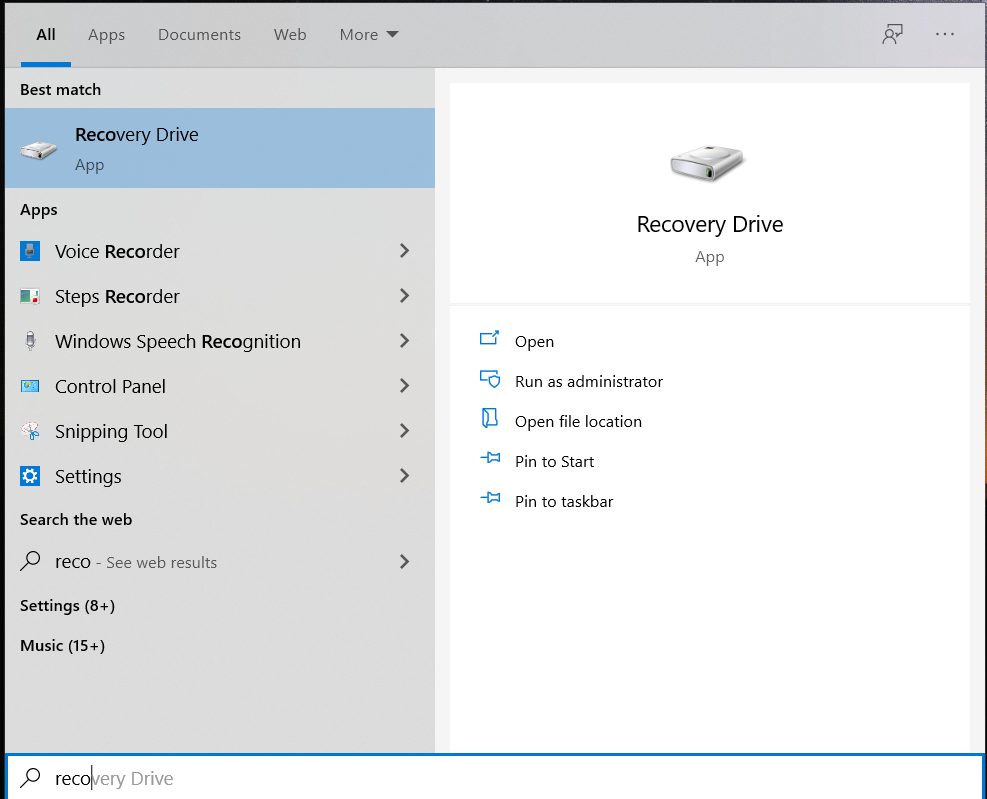

- In the search box next to the Start button, search for Create a recovery drive and then select it.
- When the tool opens, make sure “Back up system files to the recovery drive” is selected and then select Next.
- Connect an external drive to your PC, select, and then select Next.
- Select Create.
The external media will be formatted. The process of creating recovery media will take time. Also during the media creation wizard, Windows will recommend the minimum size of the recovery media.
How to restore or recover a PC using the recovery drive?
So now the day has come where you need to take out the good old recovery drive you have created. But how to actually use it?
Below are the steps to restore or recover your PC from the recovery drive:
- Connect the recovery drive and turn ON your PC.
- Restart your PC by pressing Shift Key and selecting the Restart button together from the start menu.
-
Your PC will restart in the Windows Recovery (WinRE) Environment.

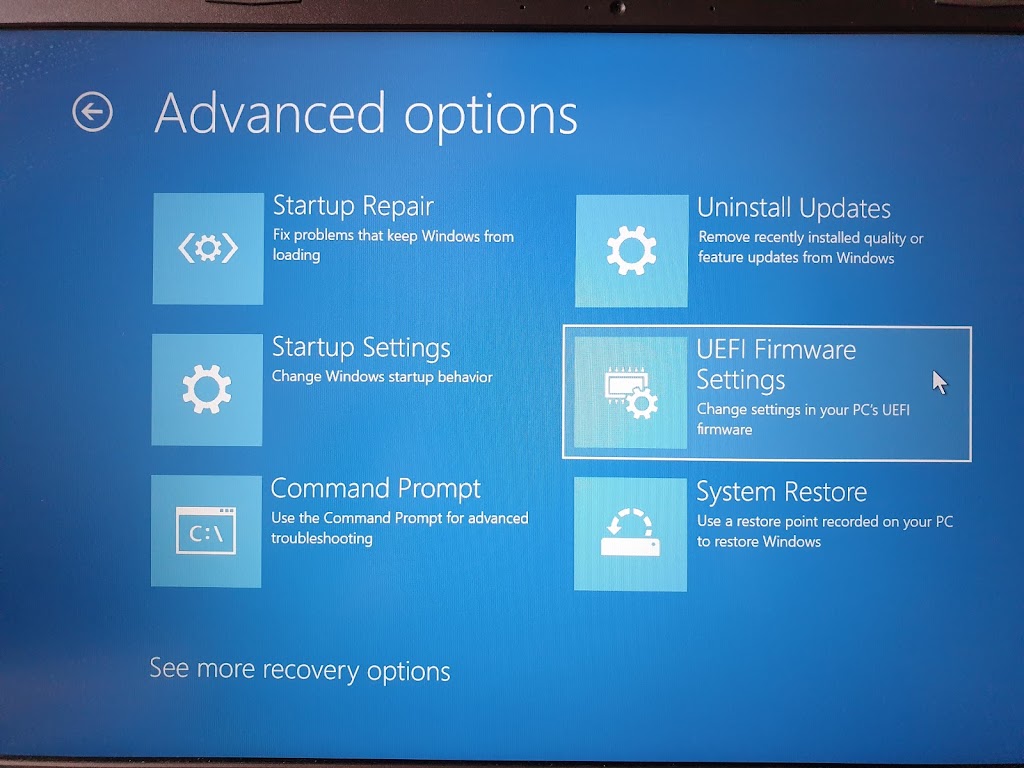
Windows Recovery options - On the choose an option screen, select Troubleshoot, and then select one of the following two options. (If you don’t see the Choose your option screen, your PC might not be set up to boot from a drive. Check your PC manufacturer’s website for info on how to change your PC’s boot order.)
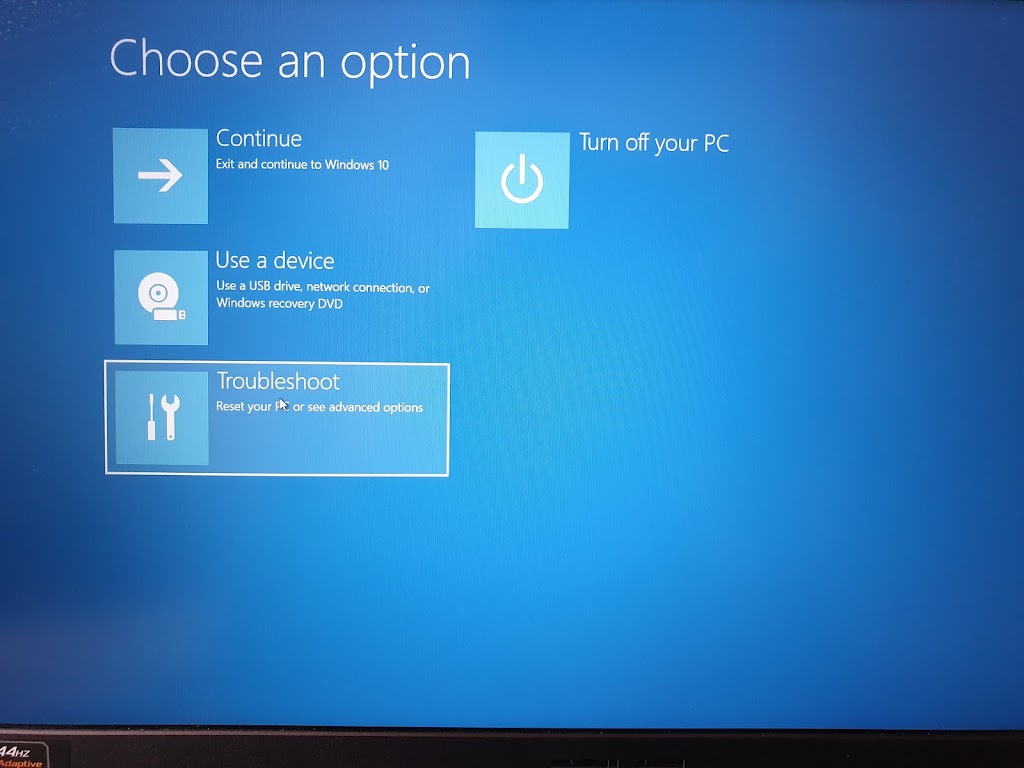
- To restore from a system restore point, select Advanced Options > System Restore. This won’t affect your personal files, but it will remove recently installed apps, drivers, and updates that might be causing your PC problems.
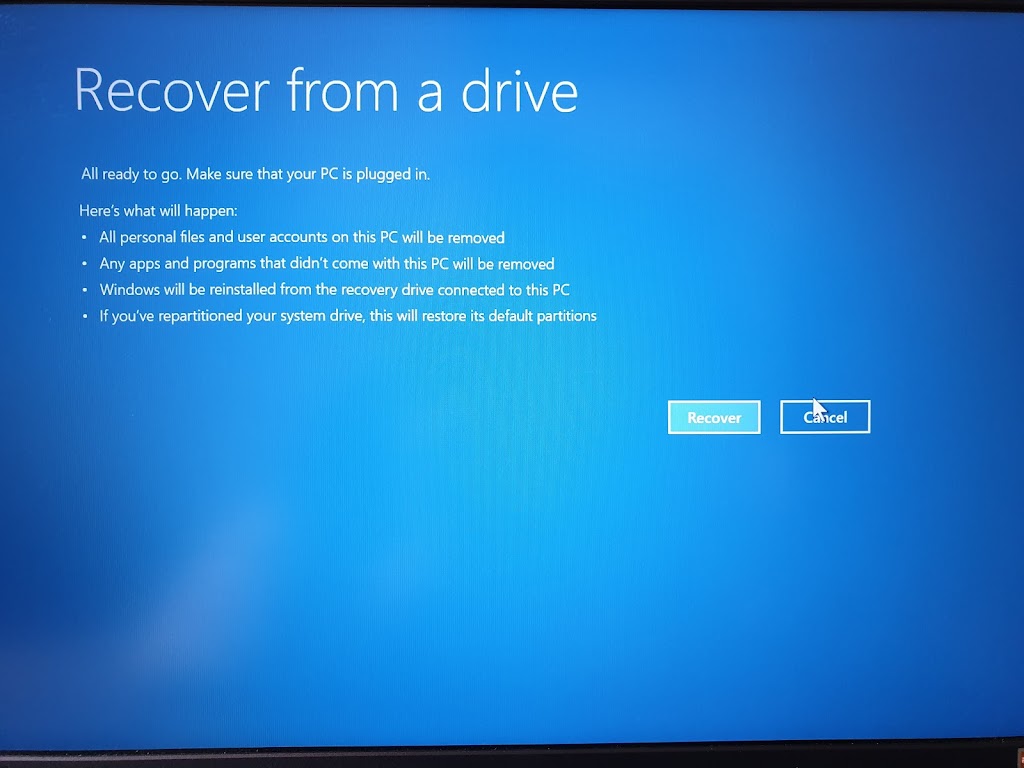
- To reinstall Windows 10, select Advanced Options > Recover from a drive. This will remove your personal files, apps and drivers you installed, and changes you made to settings.


How to change the PC’s boot order to detect the recovery drive?
A computer boot order is a priority list in which the system will start looking for installed OS files for a successful bootup. By default the priority is the system hard drive in which Windows OS is installed. But if the OS is not found in the first sequence, the system will scan the second drive or media looking for the OS file. If you are running a recovery program you need to tell the OS to boot from a different drive or media such as from a DVD or USB.
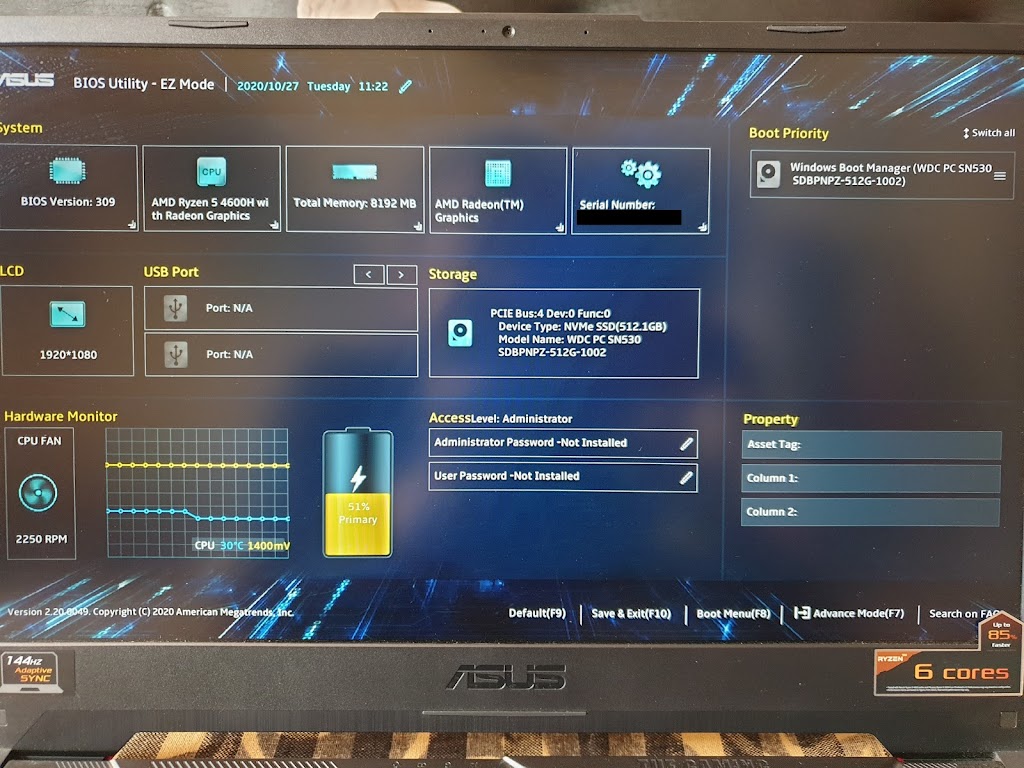
The boot order can be changed by entering into the computer BIOS or UEFI firmware settings. To enter into the BIOS settings, you’ll need to restart your computer and press a specific key at the start of the boot process. This specific key depends upon the computer manufacturer and can be easily found on their website. Usually during the restart process, the boot key is displayed on screen for a short duration. For example, you may see a message that says “Press <DEL> to enter setup” or “Press F2 to access the BIOS”. If you press the mentioned key at the right moment, you will be taken to the BIOS setting page.
Newer PCs will be shipped with UEFI firmware and you can enter into the UEFI settings, press and hold the “Shift” key and then click the “Restart” option in the Start menu. Windows will then reboot into a special boot options menu.
 |
|||
| UEFI Firmware Settings page in ASUS Laptop |
 |
| Drag and Drop to change Boot Priority sequence once USB is attached to system |
- Select and then drag-and-drop the USB or external media to bring it first into the boot priority list. (USB not attached and shown in above screenshot)
- Save the changes and exit from the Boot menu.
Now in the next restart your computer will scan the newly selected USB or media to boot from. Also don’t forget to cross check and revert (if necessary) the boot sequence to boot from final OS installation media.
