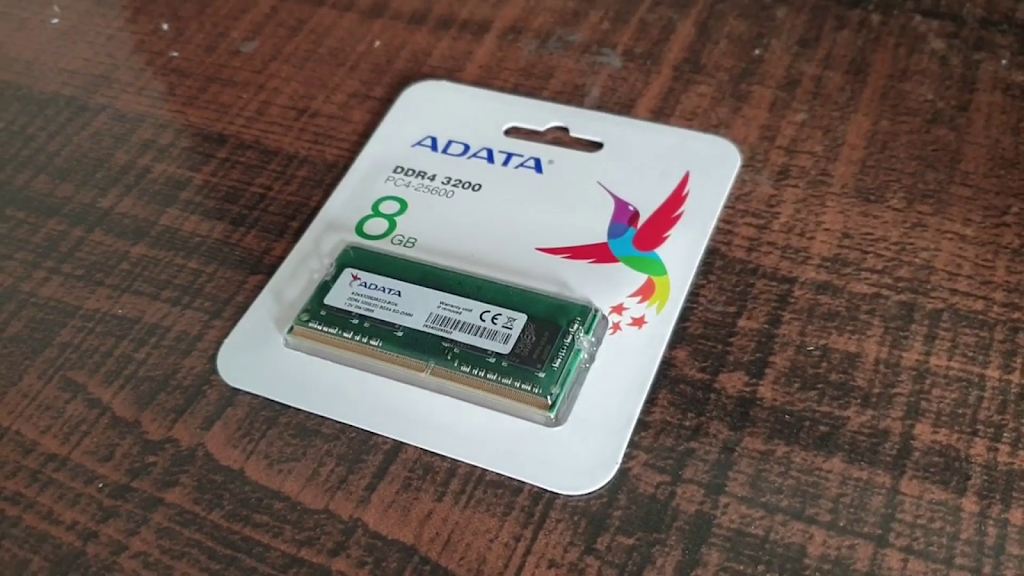
Today in this article I am going through steps on how to install or upgrade RAM in any laptop. Also in the end I will show you how to register your newly bought RAM on the official website so that you can avail warranty benefits.
First move is to unwrap the package which has arrived with the RAM in it. I have ordered this 8GB RAM online from Flipkart since it was not available in local offline stores. It took exactly one week to get my order delivered.
Inside the delivery package we will get the retail box. Check whether the seal of the box is intact.
 |
| Adata 8GB DDR4 3200MHz RAM |
Talking about the specs, this RAM is offered by ADATA brand which is an 8GB DDR4 3200MHz SO-DIMM RAM with a CAS Latency of 22.0 clocks. If you are adding another RAM, CAS Latency number is important here and for optimum system stability it should be exactly the same as the existing RAM installed in your system. So before buying you should check the product description or contact seller to get the correct CAS Latency number of RAM. You can check the CAS Latency number of your RAM in the CPU-Z application. CPU-Z is a free application available over the internet which gives vital information about your system hardware. In the CPU-Z app, go to the Memory tab and check for CAS Latency information. In this case the number is 22.0 clocks.
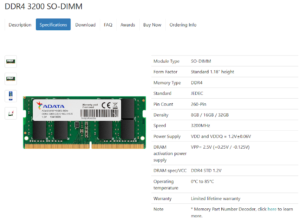 |
| Adata DDR4 3200MHz RAM Specifications |
Now we will start the RAM installing process.
- First, use a soft cloth as the base upon which your laptop will be lying.
- Place your laptop facing down on the cloth. Now the laptop which I am going to open here is my ASUS A15 TUF Gaming. It has 11 screws to open the back panel before we can access the internal hardware.
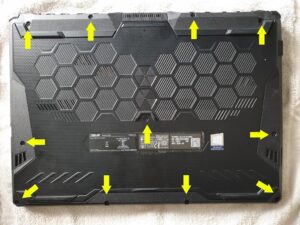
Asus A15 TUF Gaming back panel screws location - After removing all the screws, gently pop-out the back panel. Be careful of the tool and don’t insert it deep into the device to avoid any hardware damage.
- Remove the back panel and look for the RAM slot installed in the laptop. Here in this case it is covered with a black film.
- Before installing, check the cutout at the bottom of RAM. This cutout needs to get aligned with the RAM slot of the motherboard.
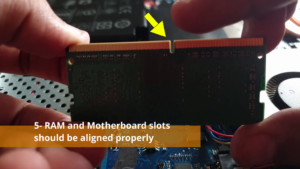
Laptop RAM slot cutout 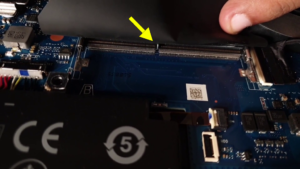
ASUS A15 TUF Gaming motherboard RAM slot - Align both the slots of RAM and Motherboard. Place the RAM inside the slot and gently push it down. You will hear a click sound which means RAM is securely gripped by the two metal holders.
Congratulations! You have now successfully upgraded the RAM capacity in your laptop and it was so simple!
Now is the time to check whether installation was successful. Don’t close the panel yet. We will now quickly check if newly installed RAM is getting detected by system or not. In case it is not, check if the RAM is loose and remove and then install the RAM again in the slot.
There are several ways to check the RAM capacity of your system. The quickest way is to:
- Open the Task Manager> Go to Performance Tab and Click on Memory.

RAM information in Windows Task Manager - Or else open the CPU-Z application, go to Memory Tab to check the RAM capacity of the system. Inside this app, you can also go to SPD tab where you will find all slots available in your system. Each slot will show the Brand Name, Capacity, Frequency and other vital information about RAM.
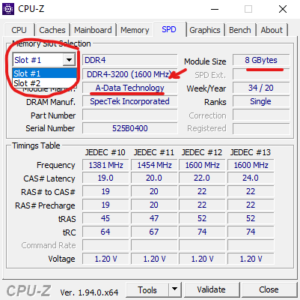
RAM information in CPU-Z Application
Now we will talk about registering the newly purchased RAM on the vendor’s official website.
Registering the product is an important step to get full benefits of warranty in case you need one. Since I have purchased Adata brand RAM, you have to open this link to get started with your product registration. Other brands will also have their official website for product registration.
- If you are a new user, you need to create a new account by clicking on ‘Create a new account now’ link on the website.
- On the next page, fill all the necessary fields to complete the signup process.
- After signing up, you will be logged in to your account, where you will see a link ‘Register my ADATA product now!”.
- Now you need to fill the details about the product, like when and from where you have purchased the product with a soft copy of the bill ready to be attached.
- Regarding the serial number, you can find it on the barcode label pasted upon the RAM or delivery box. Alternatively you can click ‘How to find the product serial number’ link to get assistance.
- After completing the form, click submit. You will get a popup message saying ‘Registration successful!’. Click OK.
You can check your registered product by going to the ‘History’ tab on your login page. Here you will get the registered product list along with other information.
Check the video for entire step by step process on installing and registering your new RAM.
