
Thanks to its offline-first approach, graph views, canvas, backlinks, and Markdown support, Obsidian has been quite popular among productivity seekers these days. Although Obsidian offers a robust set of features right out of the box, it misses one critical element that many users seek in a versatile platform – Kanban boards. Here is where third-party plugins come into play to enable Kanban boards in your Obsidian vaults.
Since I already use Obsidian as a personal knowledge management tool to store my to-do lists, thoughts, and project ideas, I wanted to create a flawless tracking system in the same vault for a better workflow. Here is how you can unlock Kanban in Obsidian to boost productivity and achieve your goals.
Related
7 reasons Obsidian is the best privacy-focused productivity app
Obsidian is where productivity meets peace of mind
Disable restricted mode in Obsidian
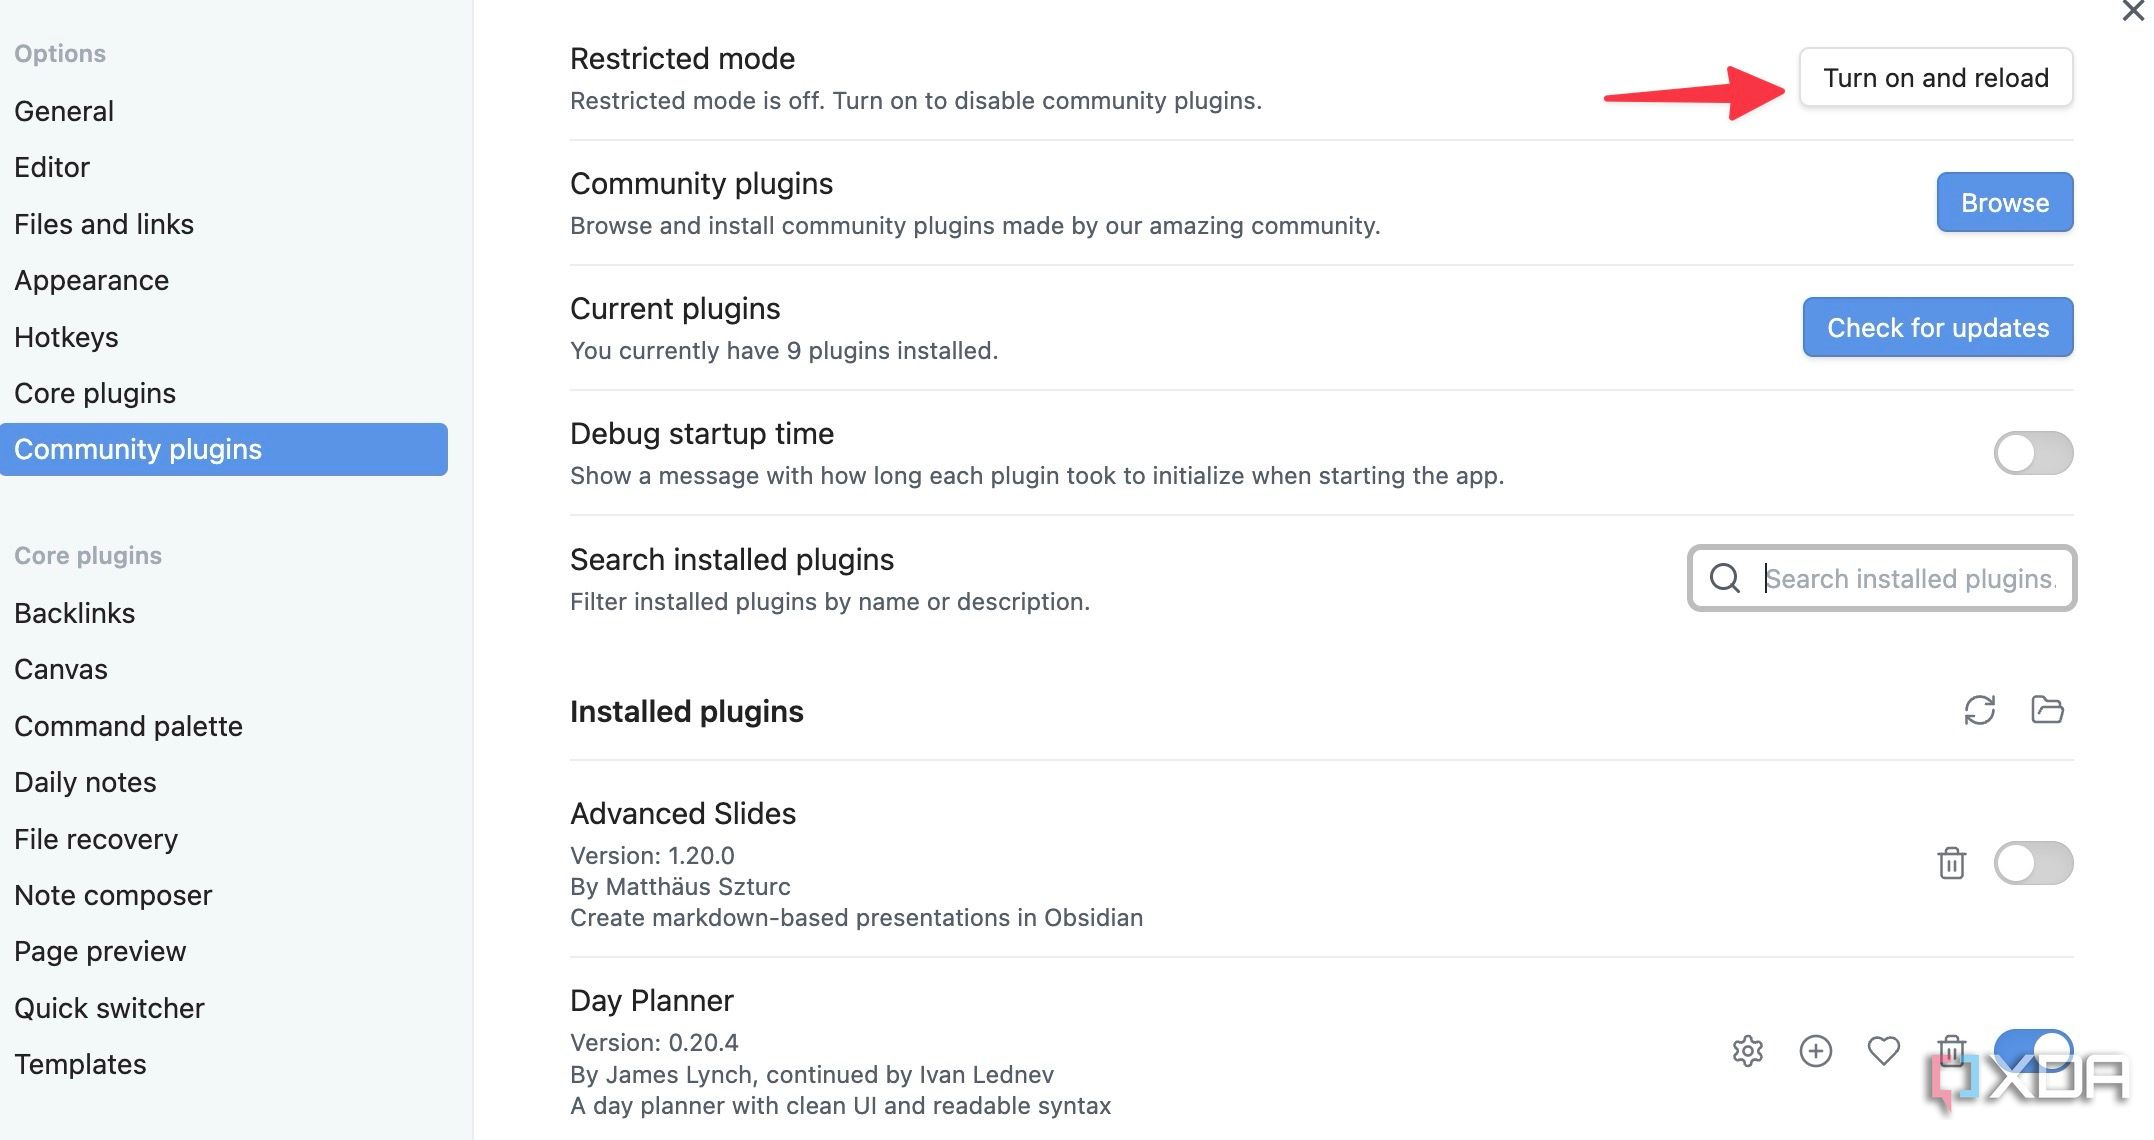
As mentioned, Obsidian doesn’t offer Kanban boards by default. You need to use a third-party plugin. However, Obsidian enables restricted mode by default, and you must turn it off to install third-party plugins. Follow the steps below.
-
Open your Obsidian vault and select the settings gear at the bottom.

- Select Community plugins from the sidebar.
-
Click Turn off and reload beside Restricted mode. (The image below shows what this looks like after it is turned off.)


That’s it. You are all set to download third-party plugins in your Obsidian vault.

Related
How to visualize your notes in Obsidian with Graph view
Mapping your mind and unlocking insights with Obsidian’s Graph view
Download the Kanban plugin
Once you disable restricted mode, it’s time to browse and install a plugin that offers board views. While there is no shortage of third-party plugins for boards, Kanban caught my attention due to its flexibility, long list of features, and active development (this aspect is quite crucial since you won’t want outdated plugins in your Obsidian vault). Follow the steps below to download it.
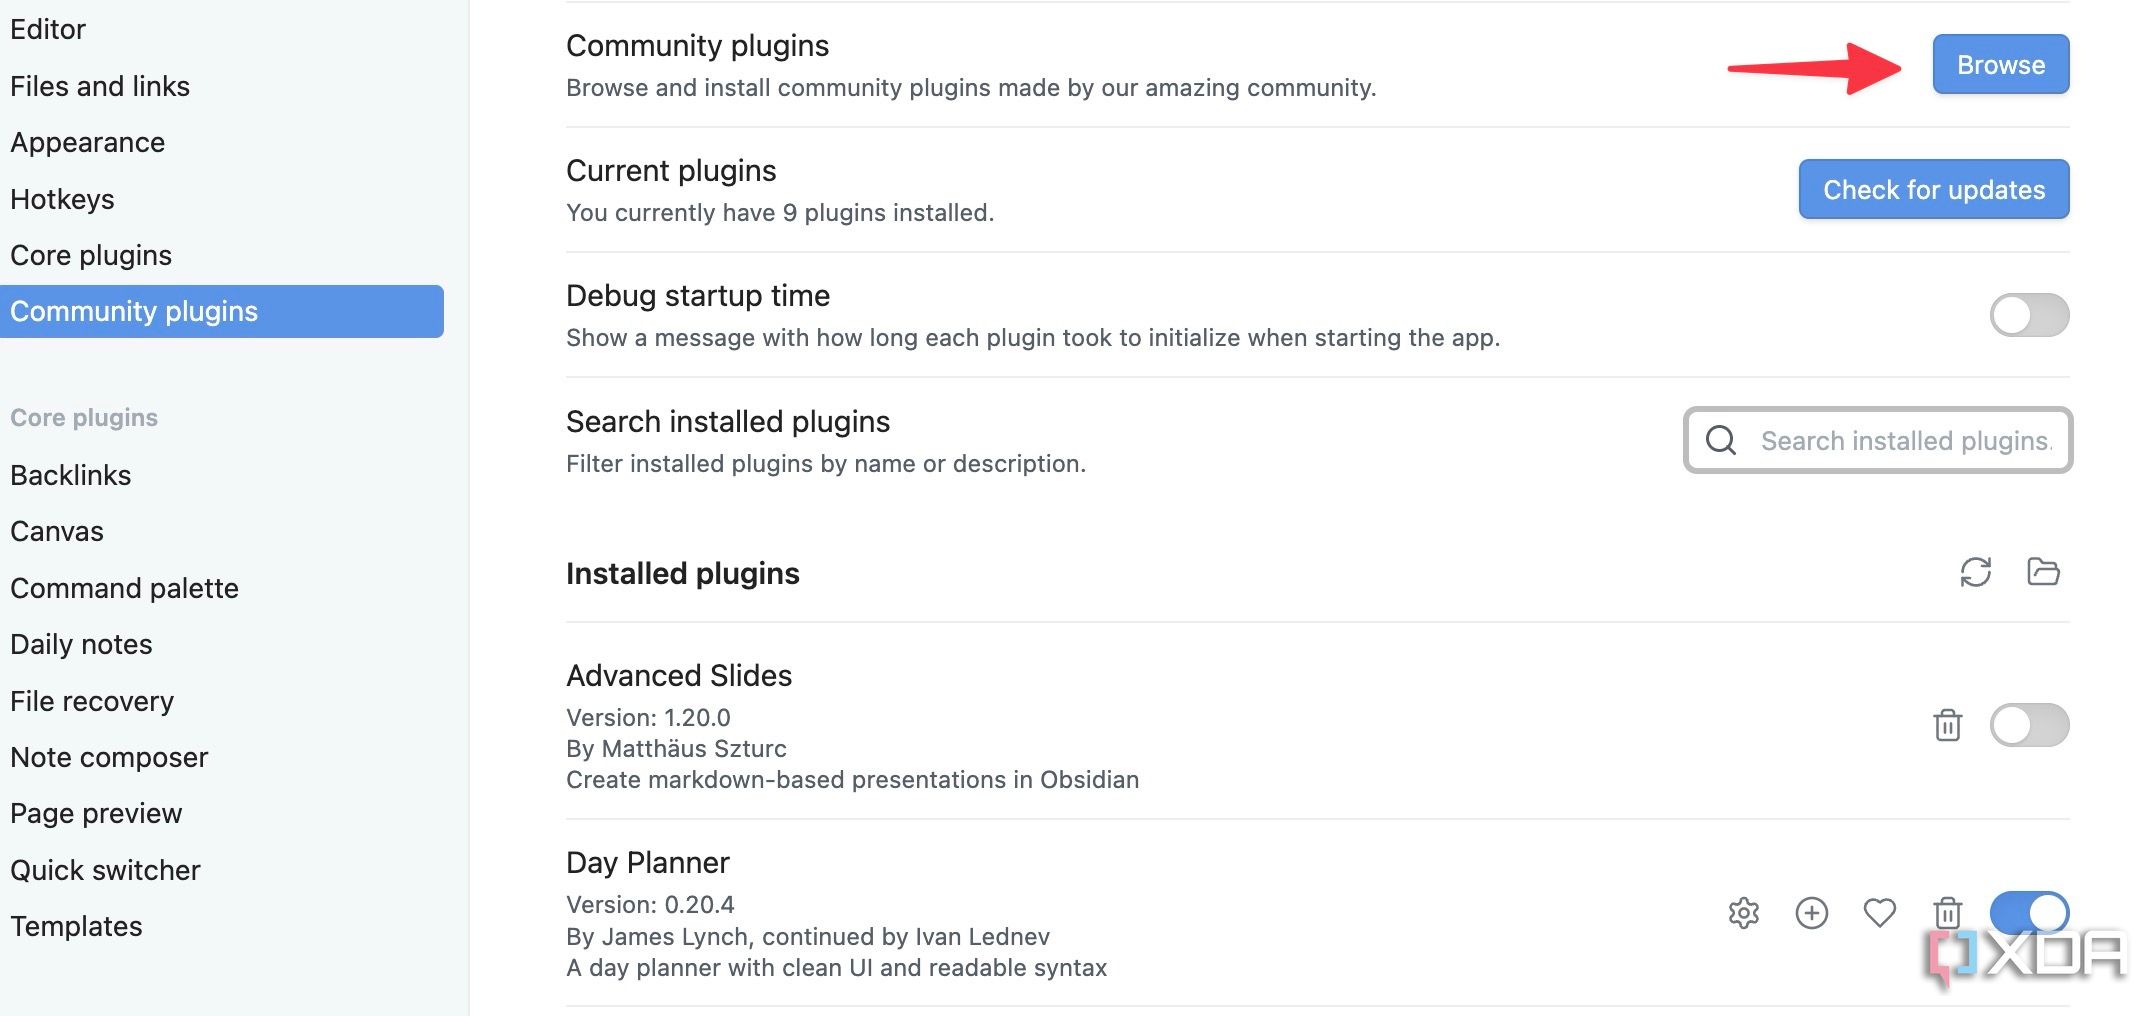
- Head to the Community plugins section in Obsidian settings.
-
Select Browse beside Community plugins.
-
Search for Kanban and click Install.
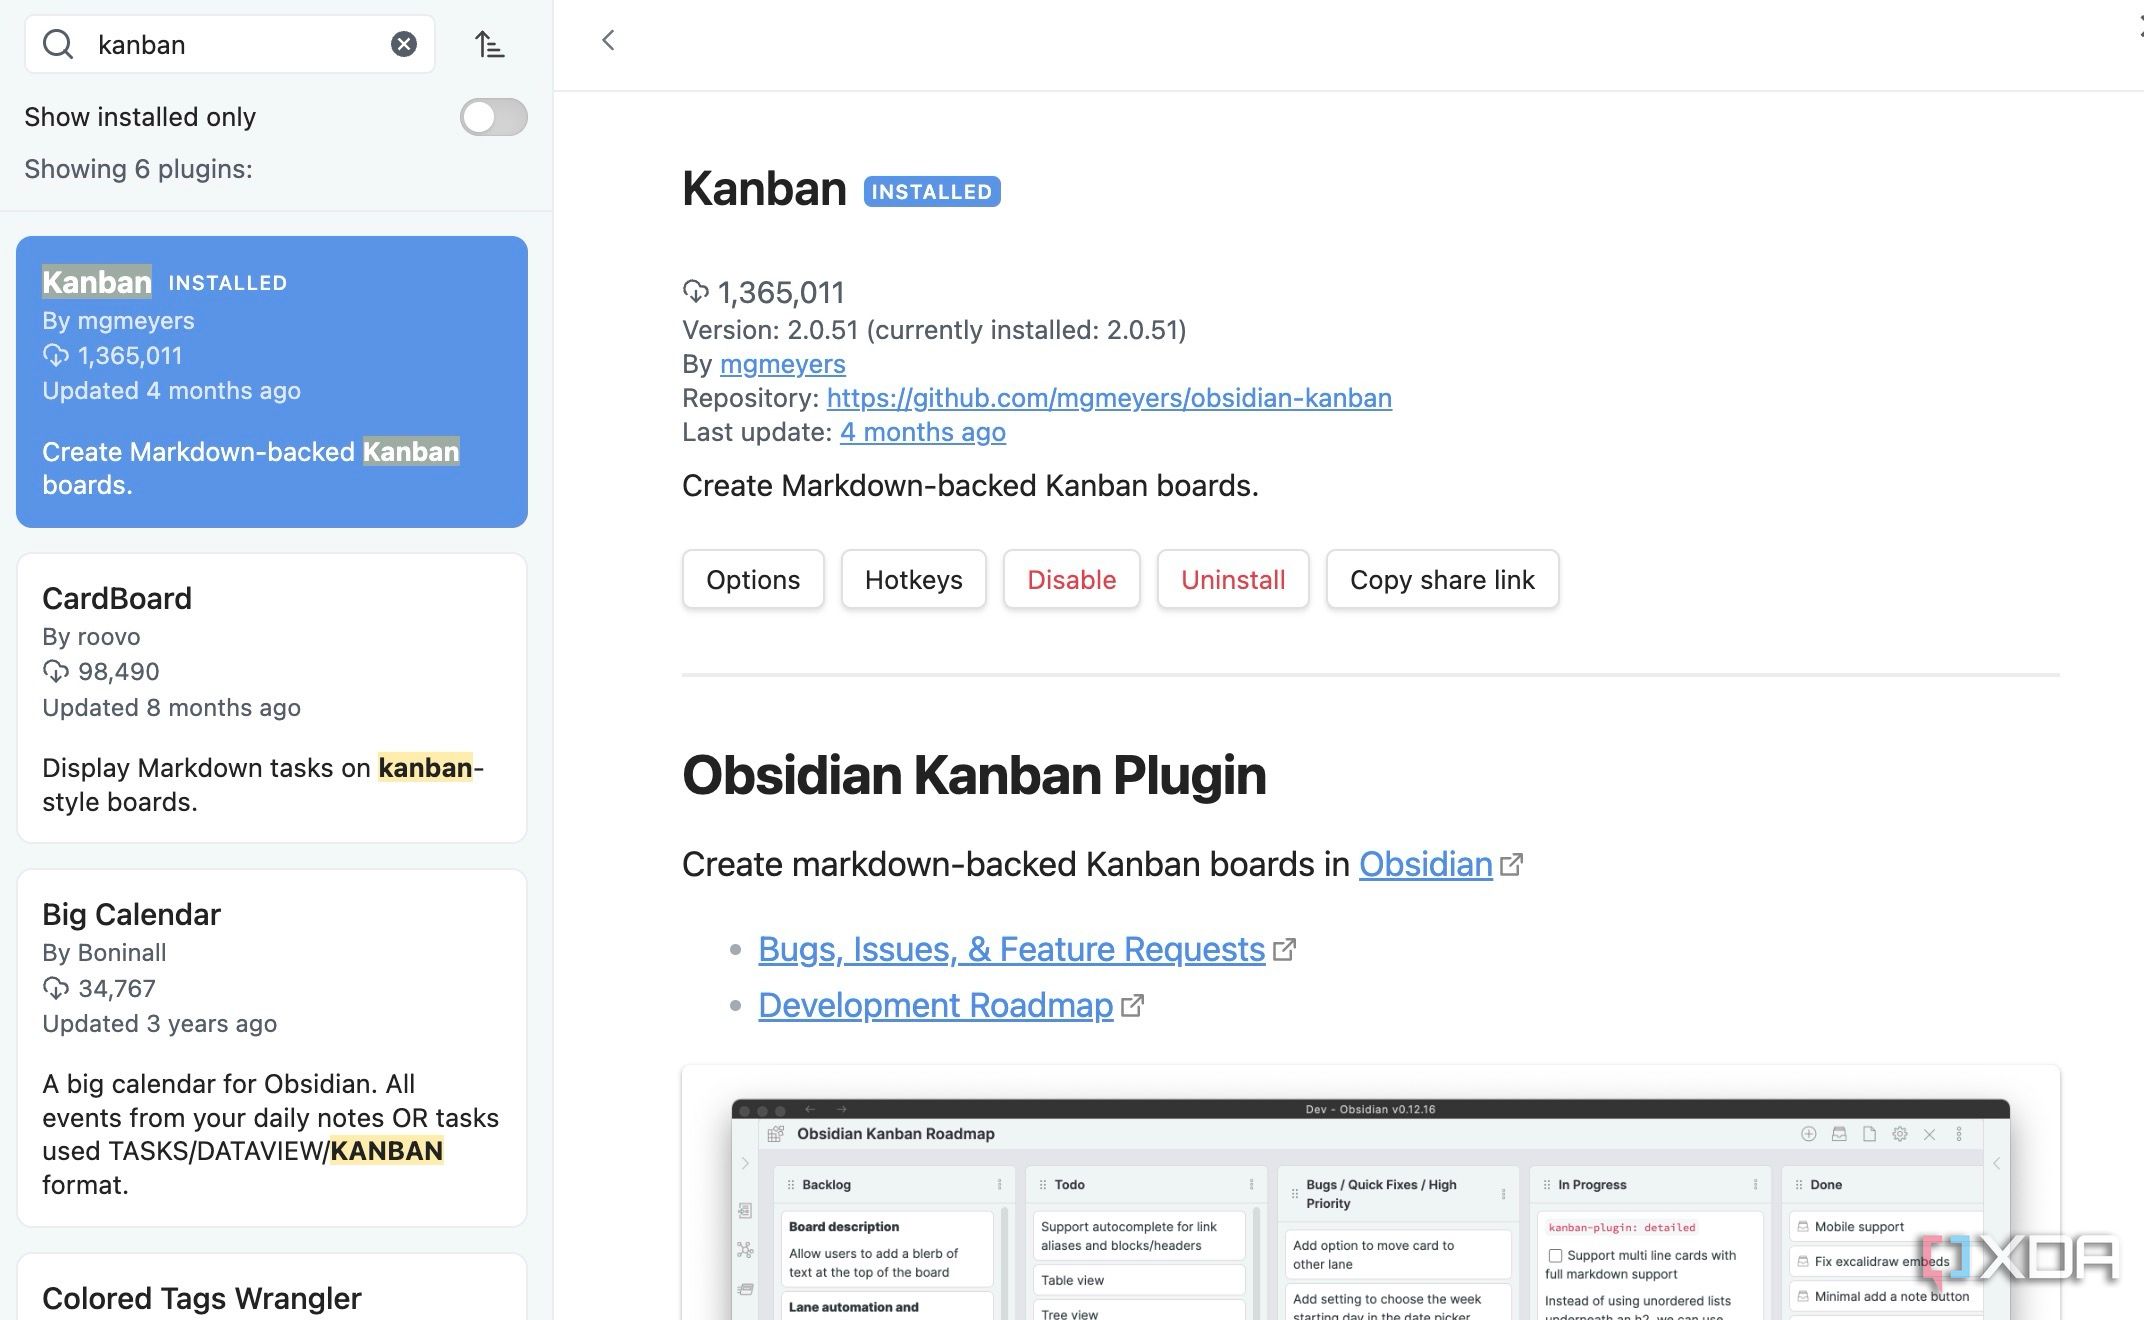


Once you download the Kanban plugin, click Enable. That’s it. You are all set to create and manage projects in Obsidian. Check out our separate post if you want to explore more plugins.

Related
10 best Obsidian plugins to supercharge your workflow
Your ideal Obsidian setup is incomplete without these plugins
Create a project with a board view in Obsidian
Now that you have enabled the Kanban plugin, let’s use it to create a project with multiple views for a client website.
-
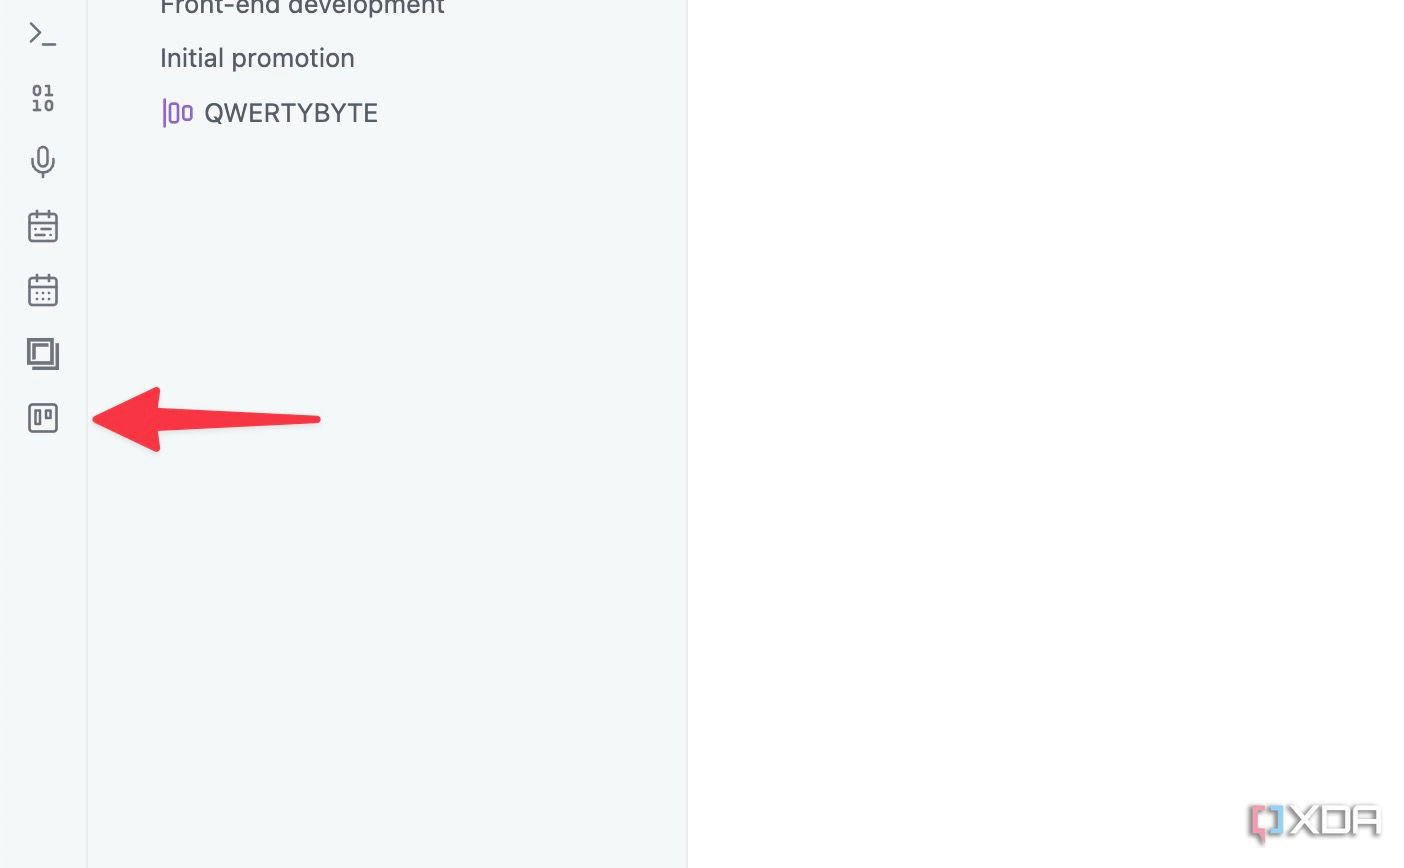
Open your Obsidian vault. Select Create new board from the sidebar.
-
It creates a new page, which will get your board started. Rename it with your project title at the top.
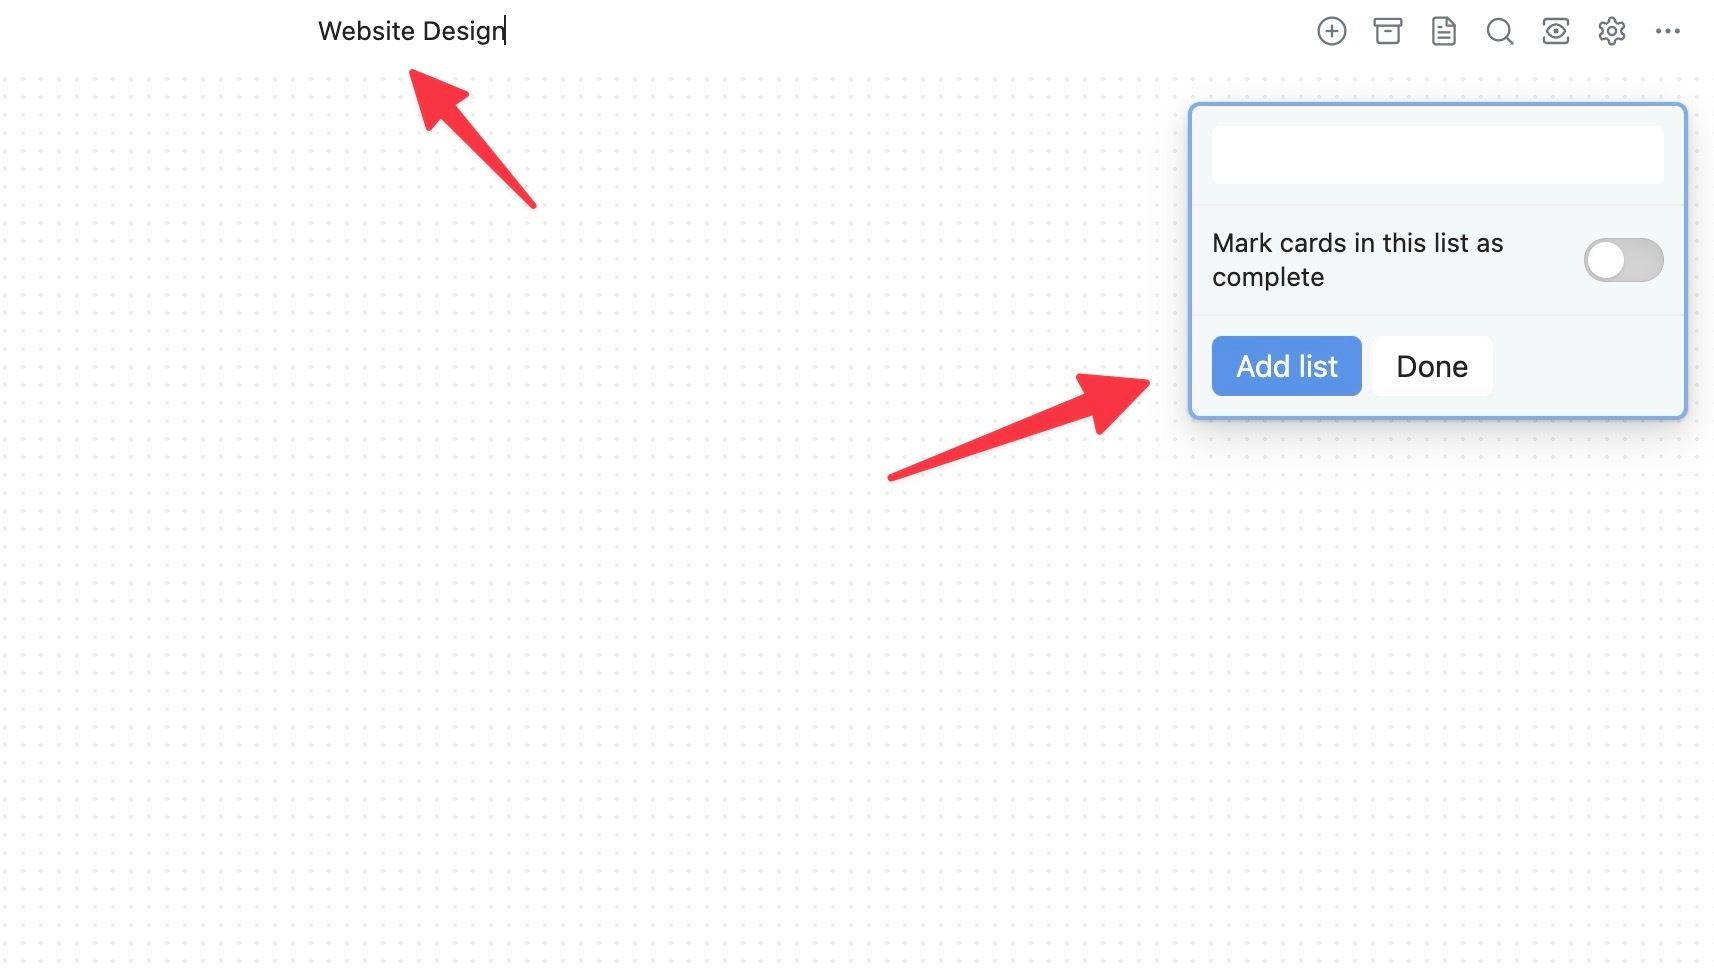
-
Click Add list. Give it a name.
-
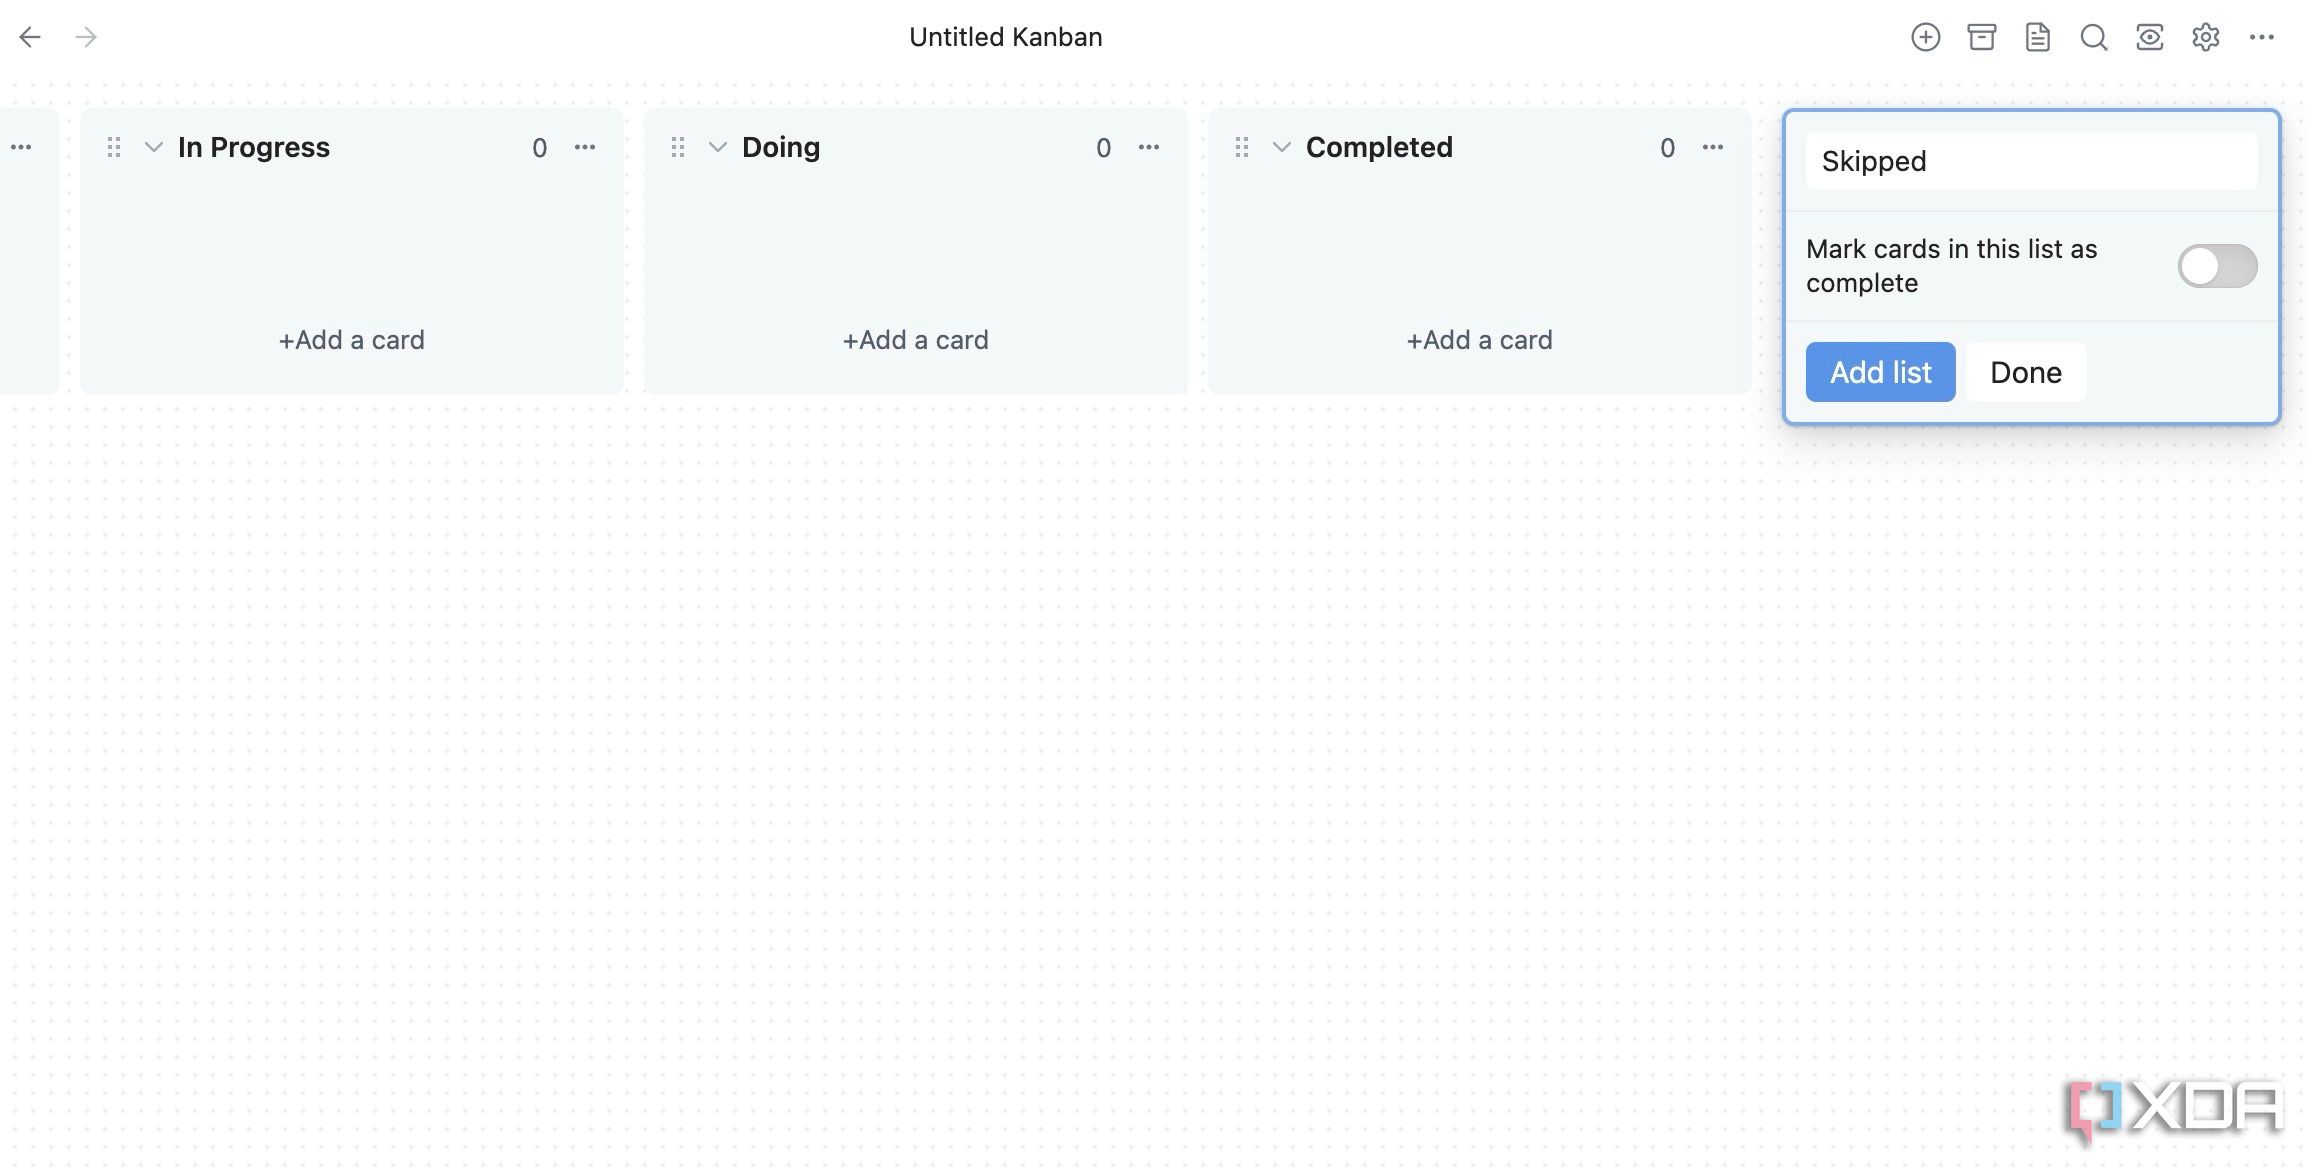
Click + in the top-right corner and add all the desired lists (columns) in your personal project.
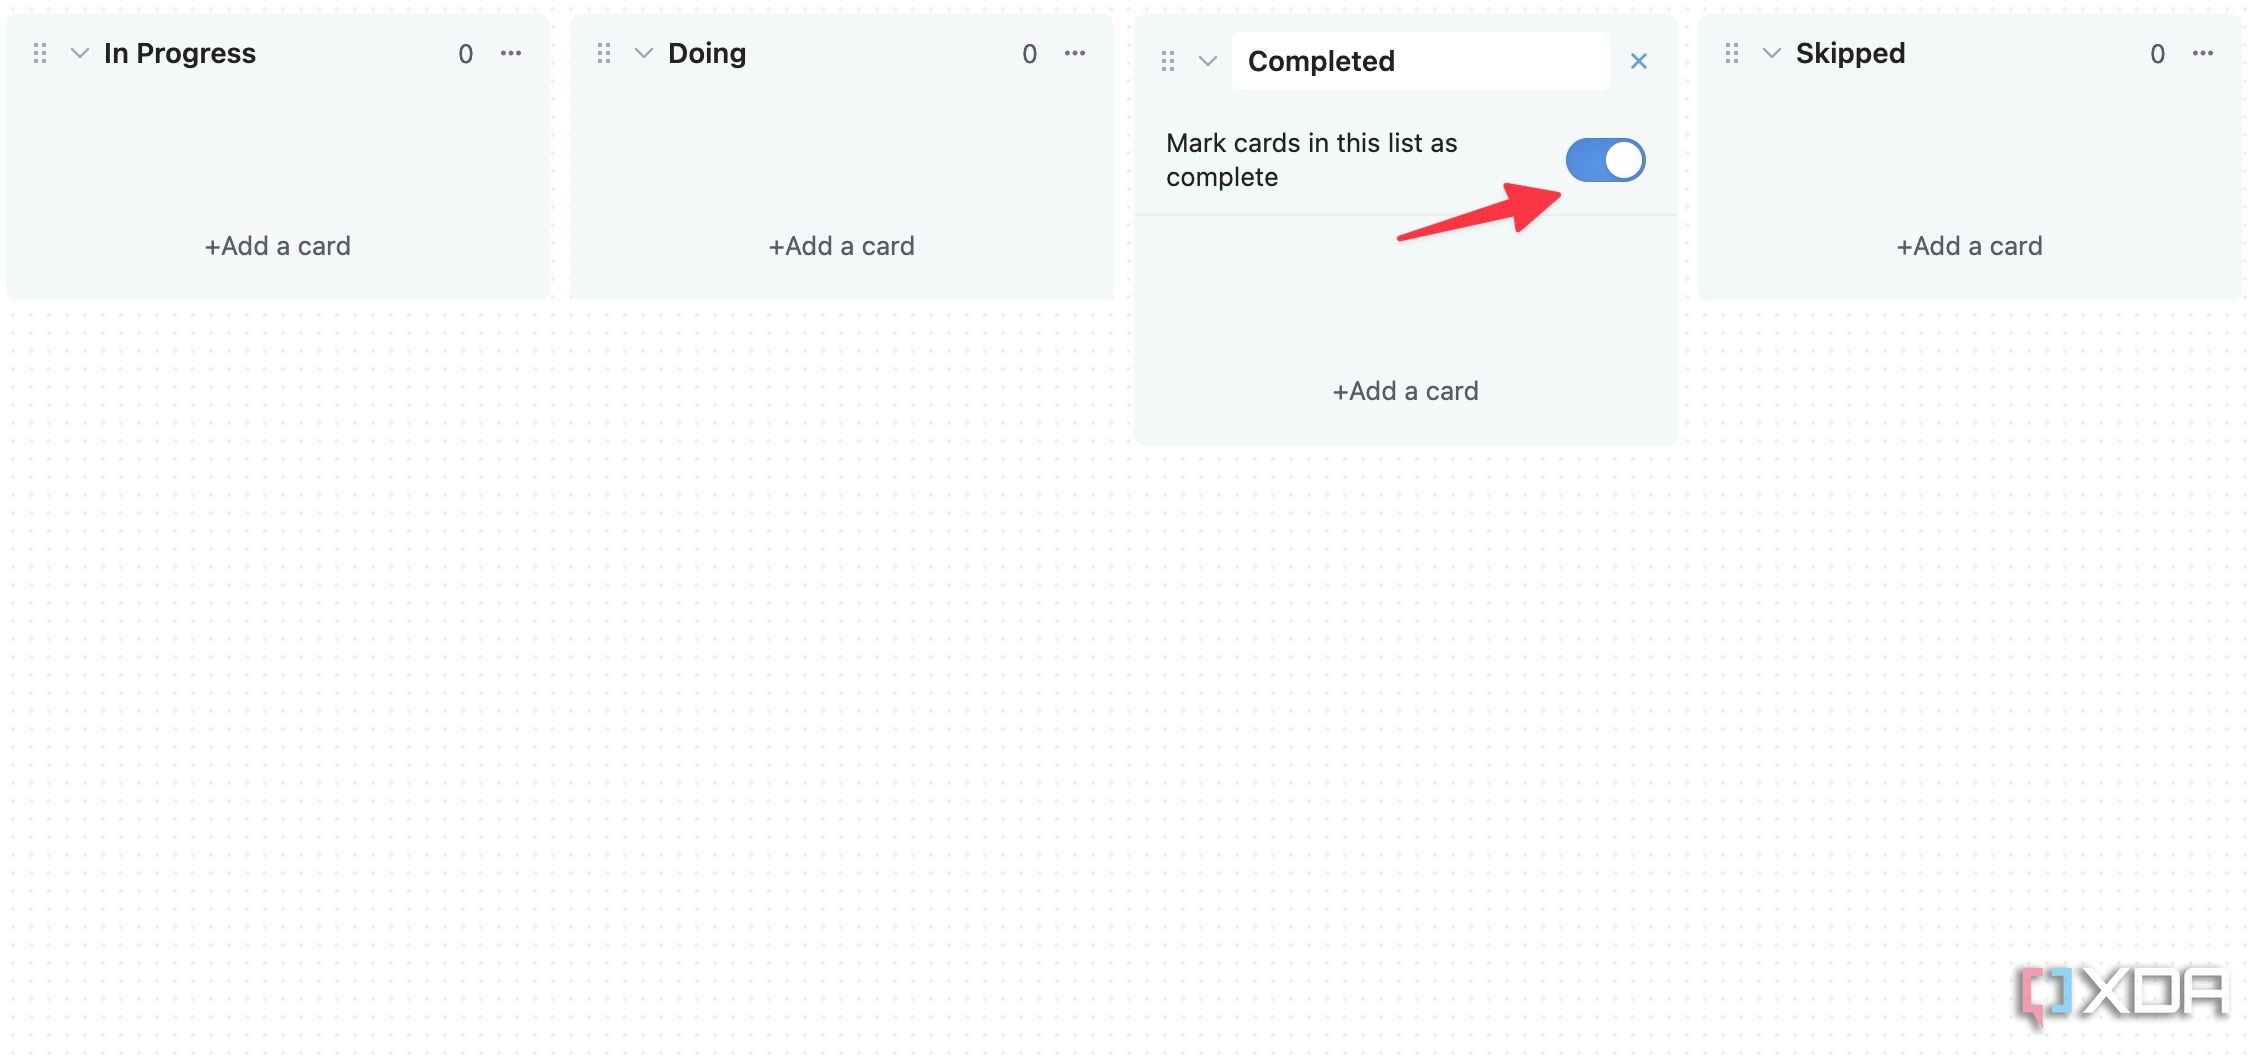
- When you create a new list, you have the option to automatically give cards a “completed” status when you move them to a certain list. For example, you could create a Completed column and have it auto-complete the tasks whenever you move tasks into it.


That’s it. The basics of your project management are all in place now.
Insert tasks under columns
Once your board view is ready, with the right workflow categories established, start adding tasks under them. Go through the steps below.
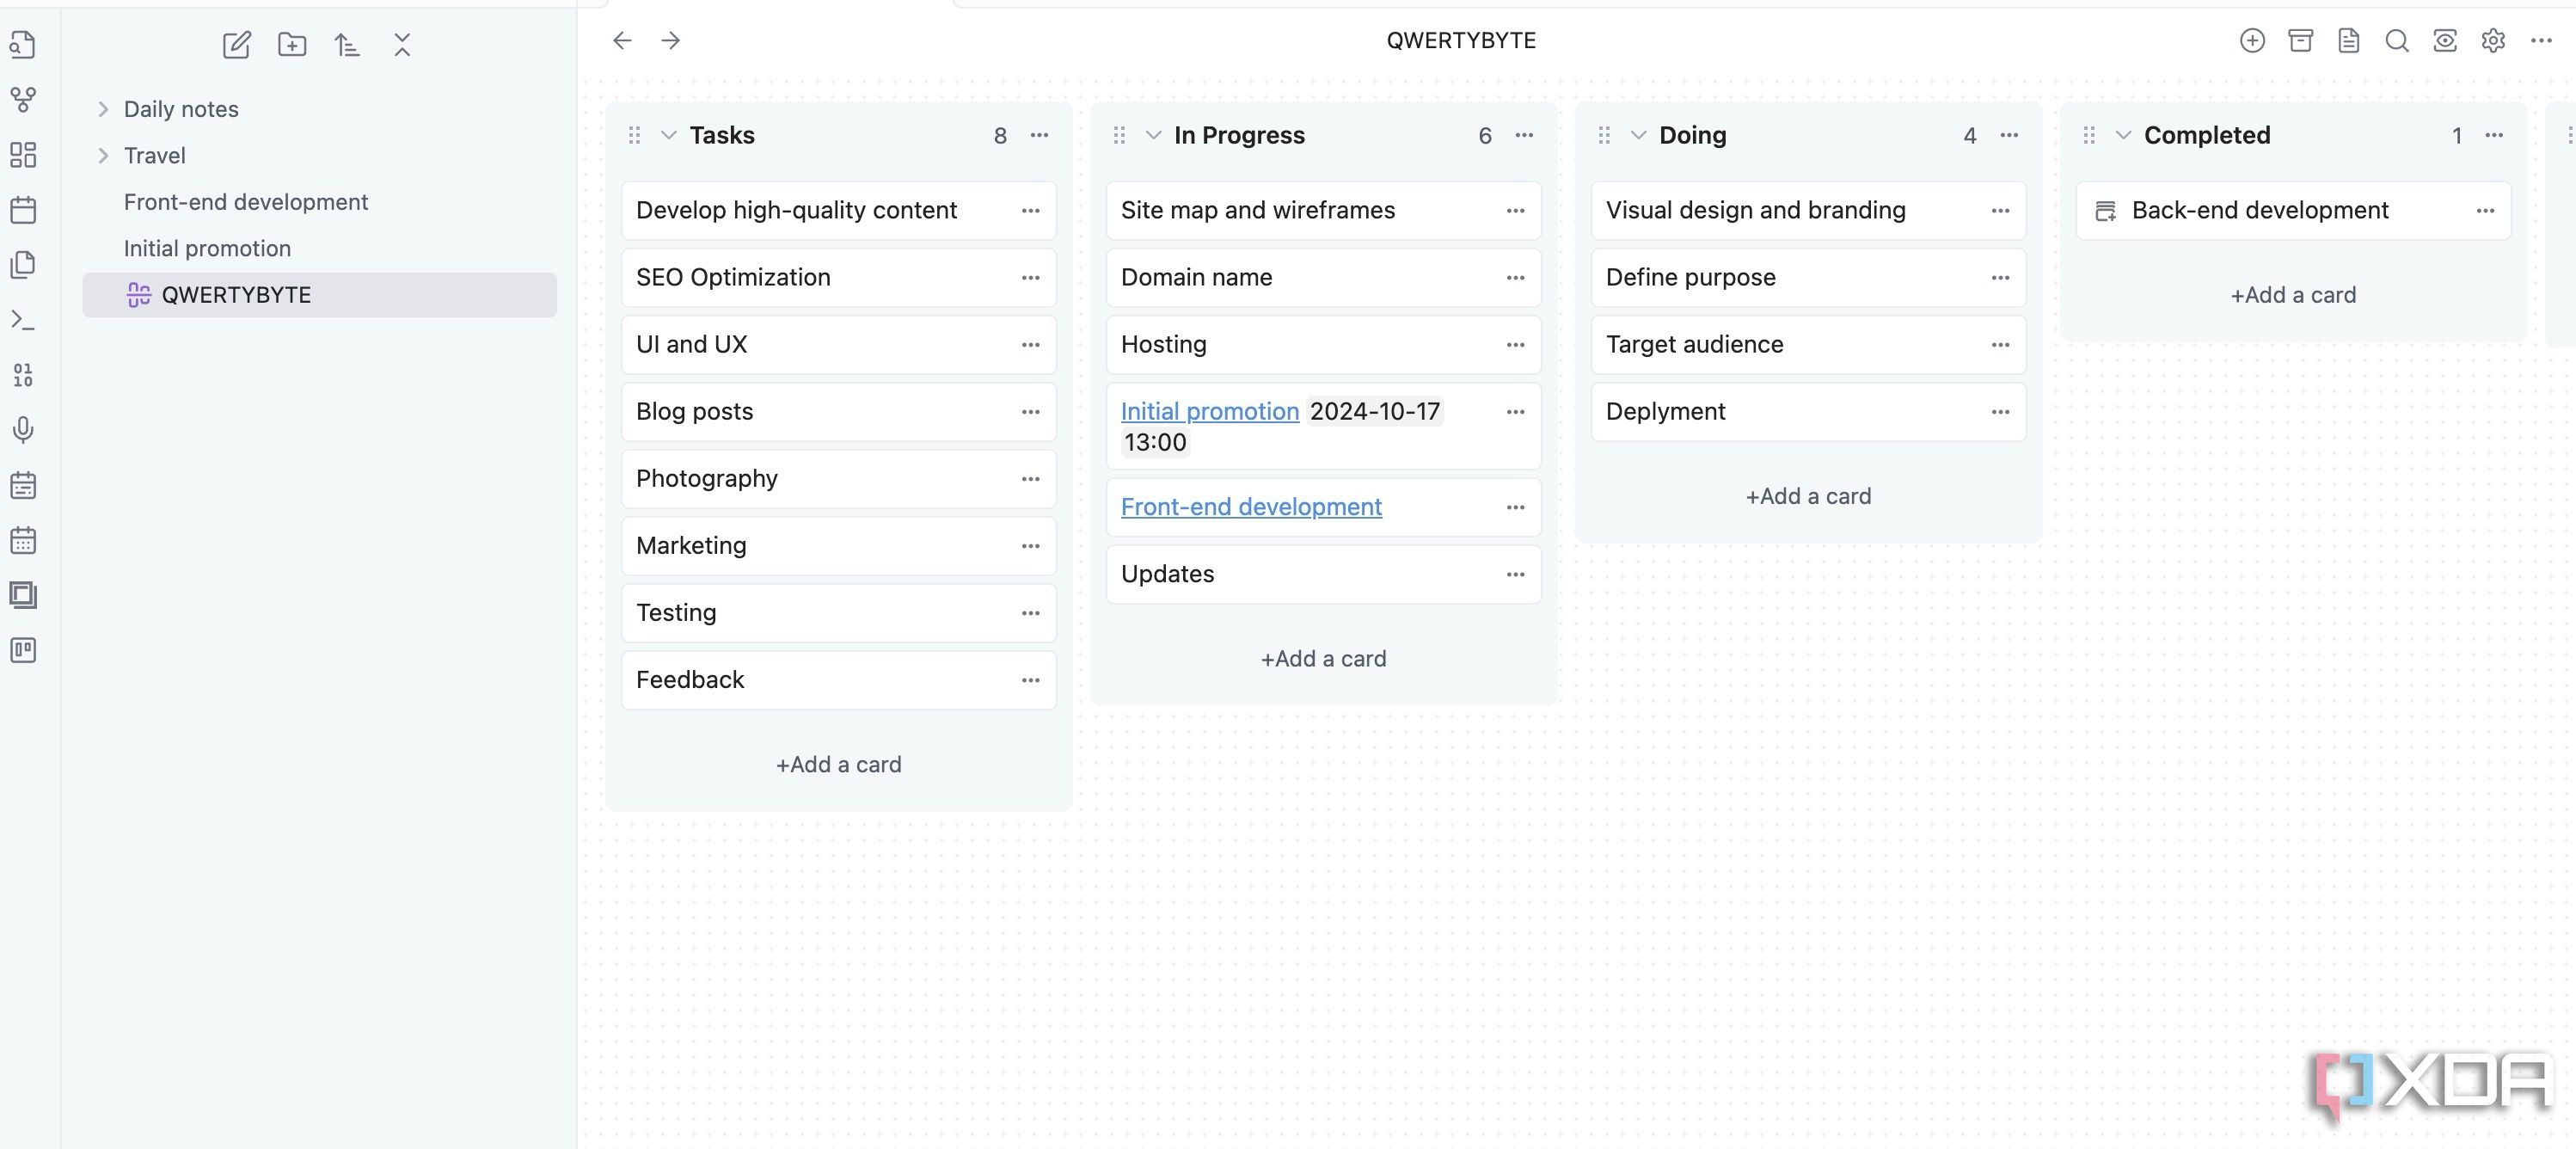
- Open your Kanban board in Obsidian and click Add a card to insert new cards with to-do list items.
- Once your cards are ready, you can simply drag and drop them to move them between columns.
-
The plugin also shows the total number of tasks under each column at the top, to help you avoid manual counting once it becomes crowded.

Enter task details
By default, you can only add cards in simple text format. However, if you want to add more details, you can convert existing tasks into notes. Here’s how.
-
Click the three-dot menu beside any task and select New note from card.

- Obsidian opens the same in a split view.
-
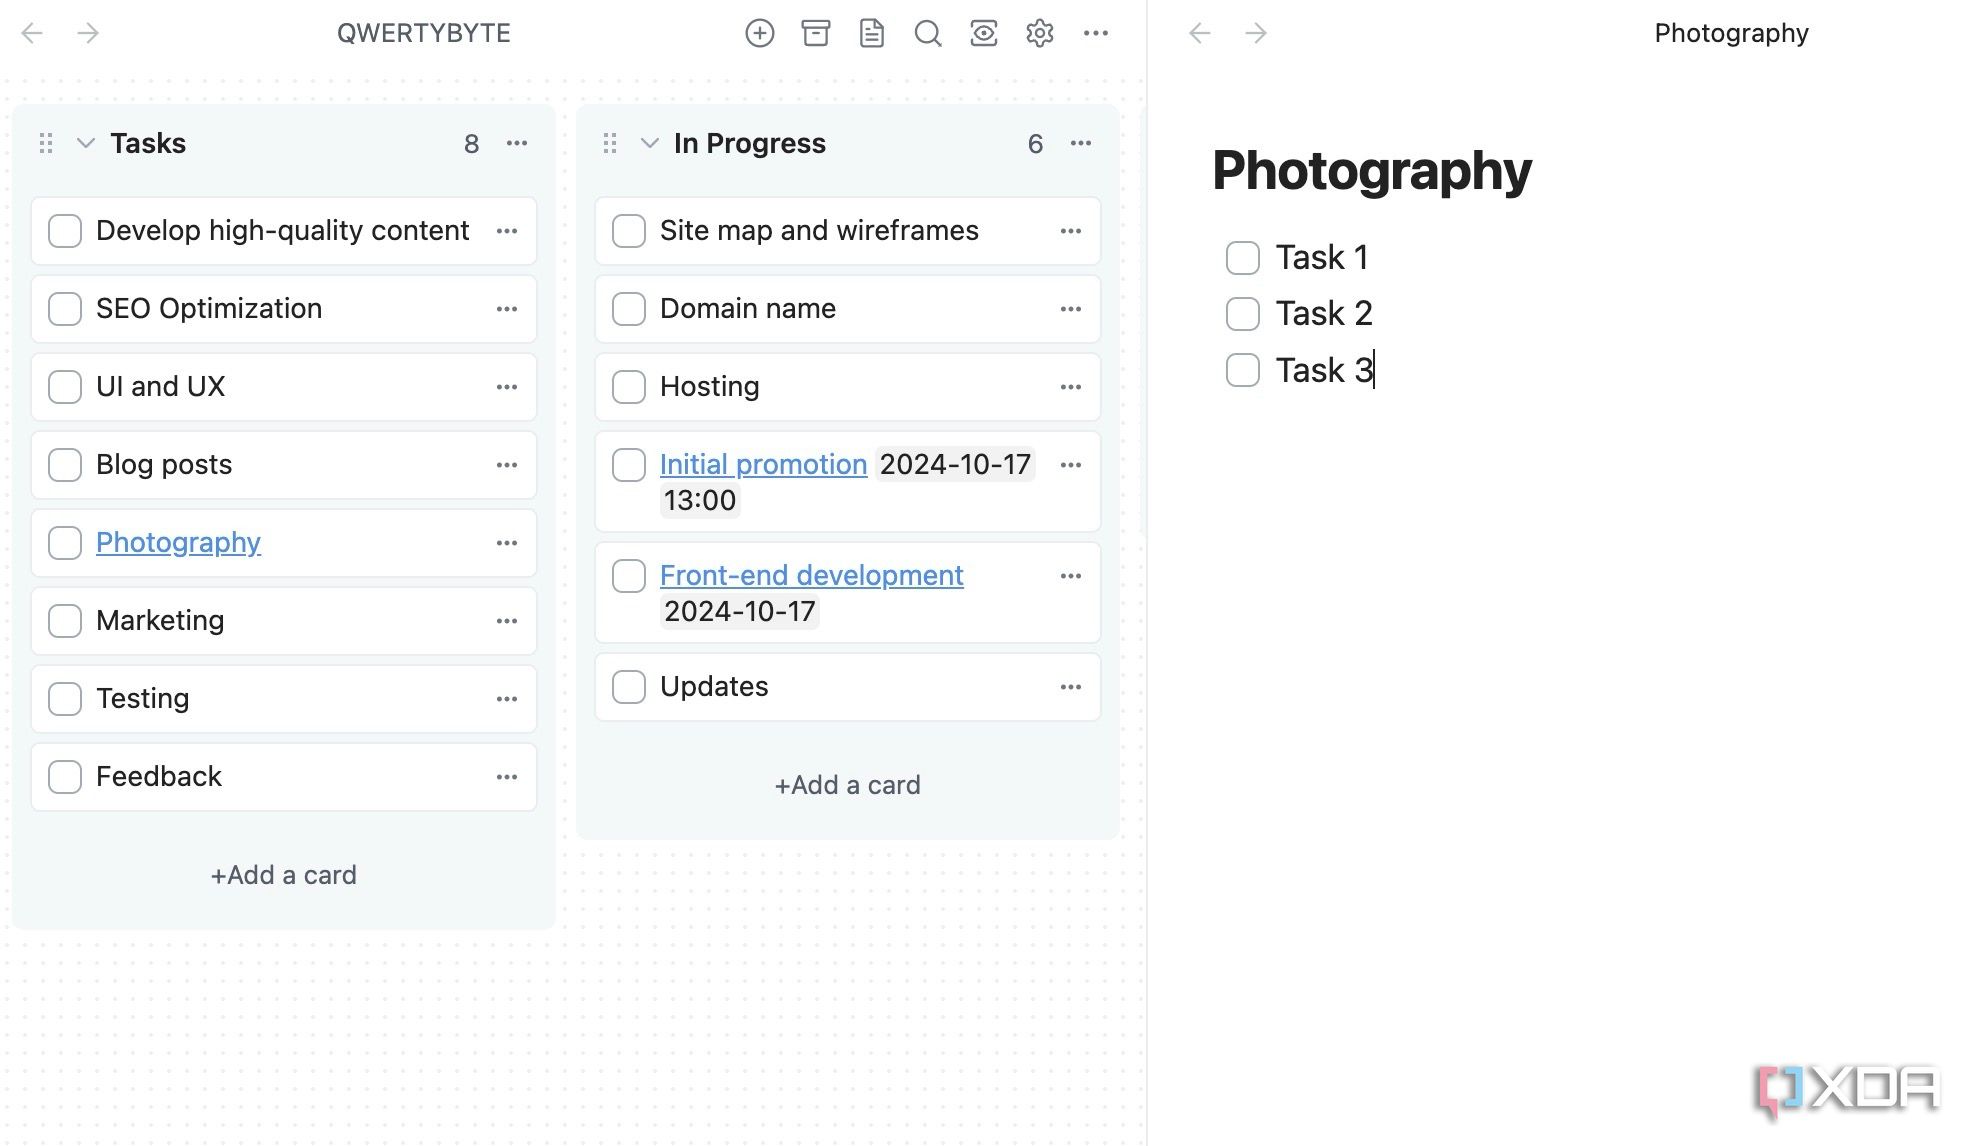
You can insert check boxes, headers, and other details into the task. It’s the same type of interface as usual here, where you can use Markdown to decorate the note the way you want. Tasks with inserted notes will appear with a different link.
-
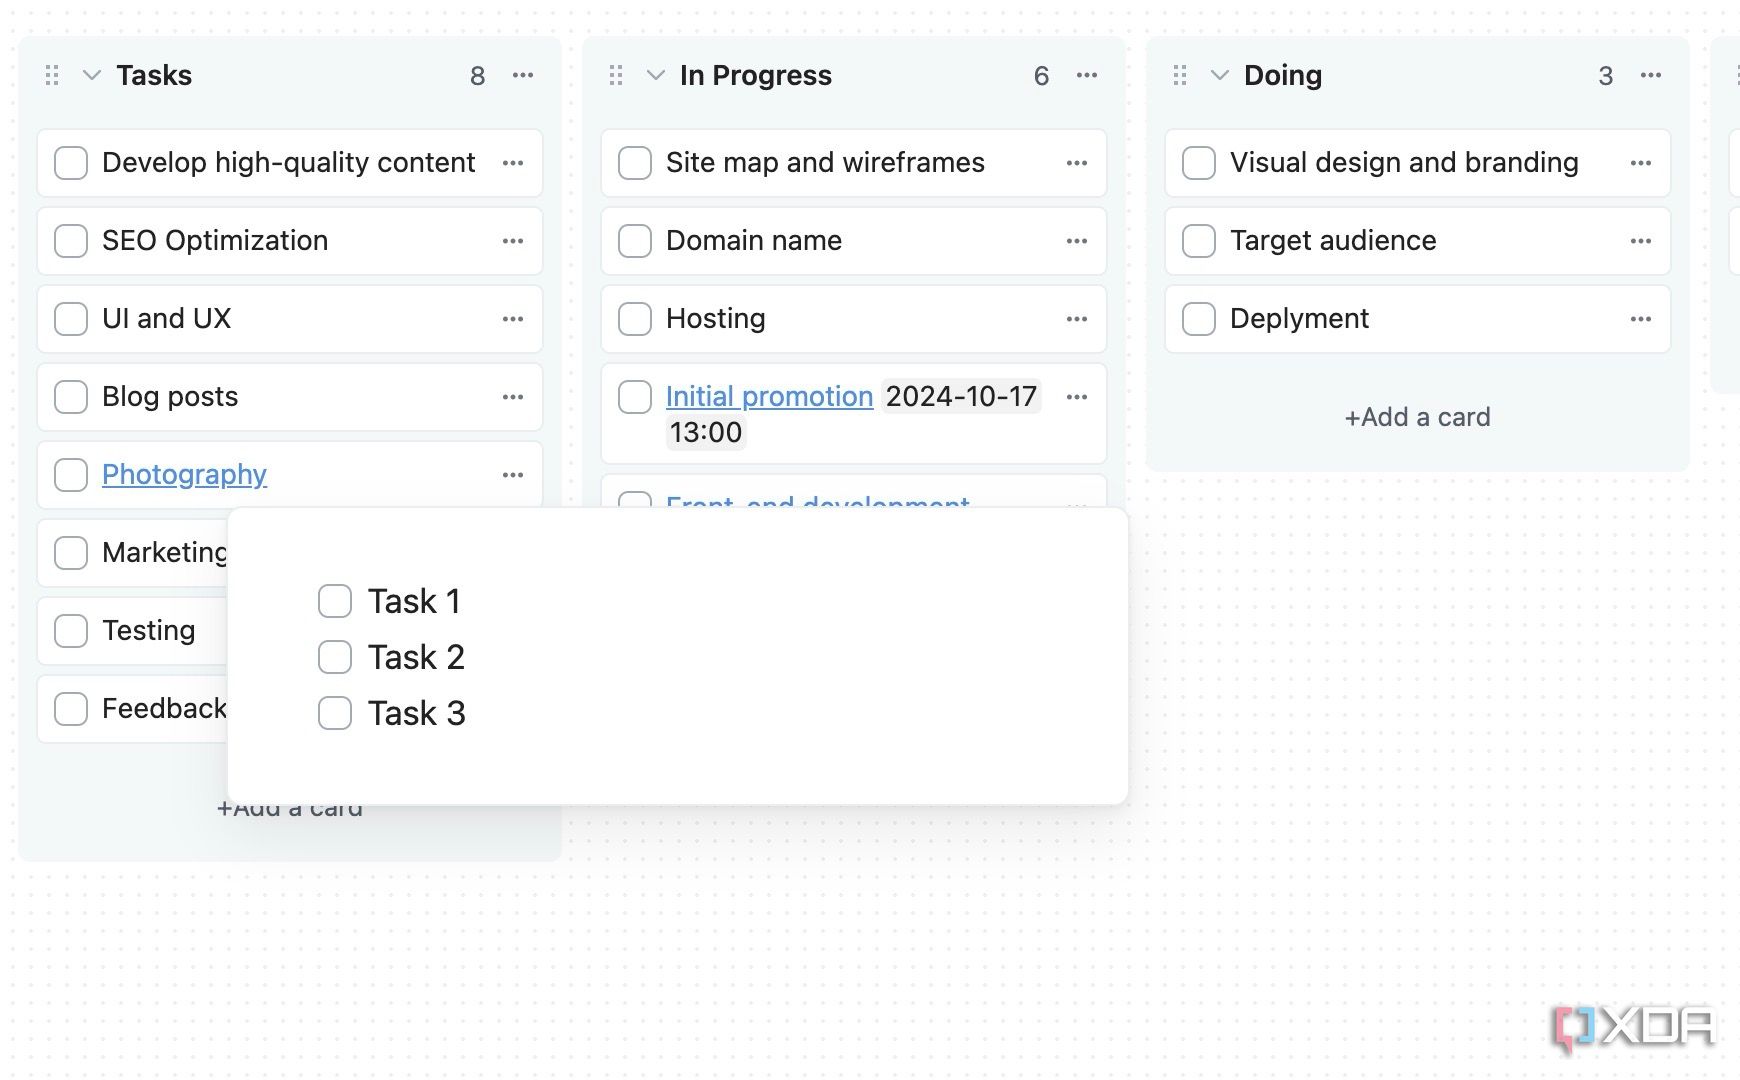
You can hover the cursor on it and glance over a neat preview window, if you don’t want to click to open the note.
-
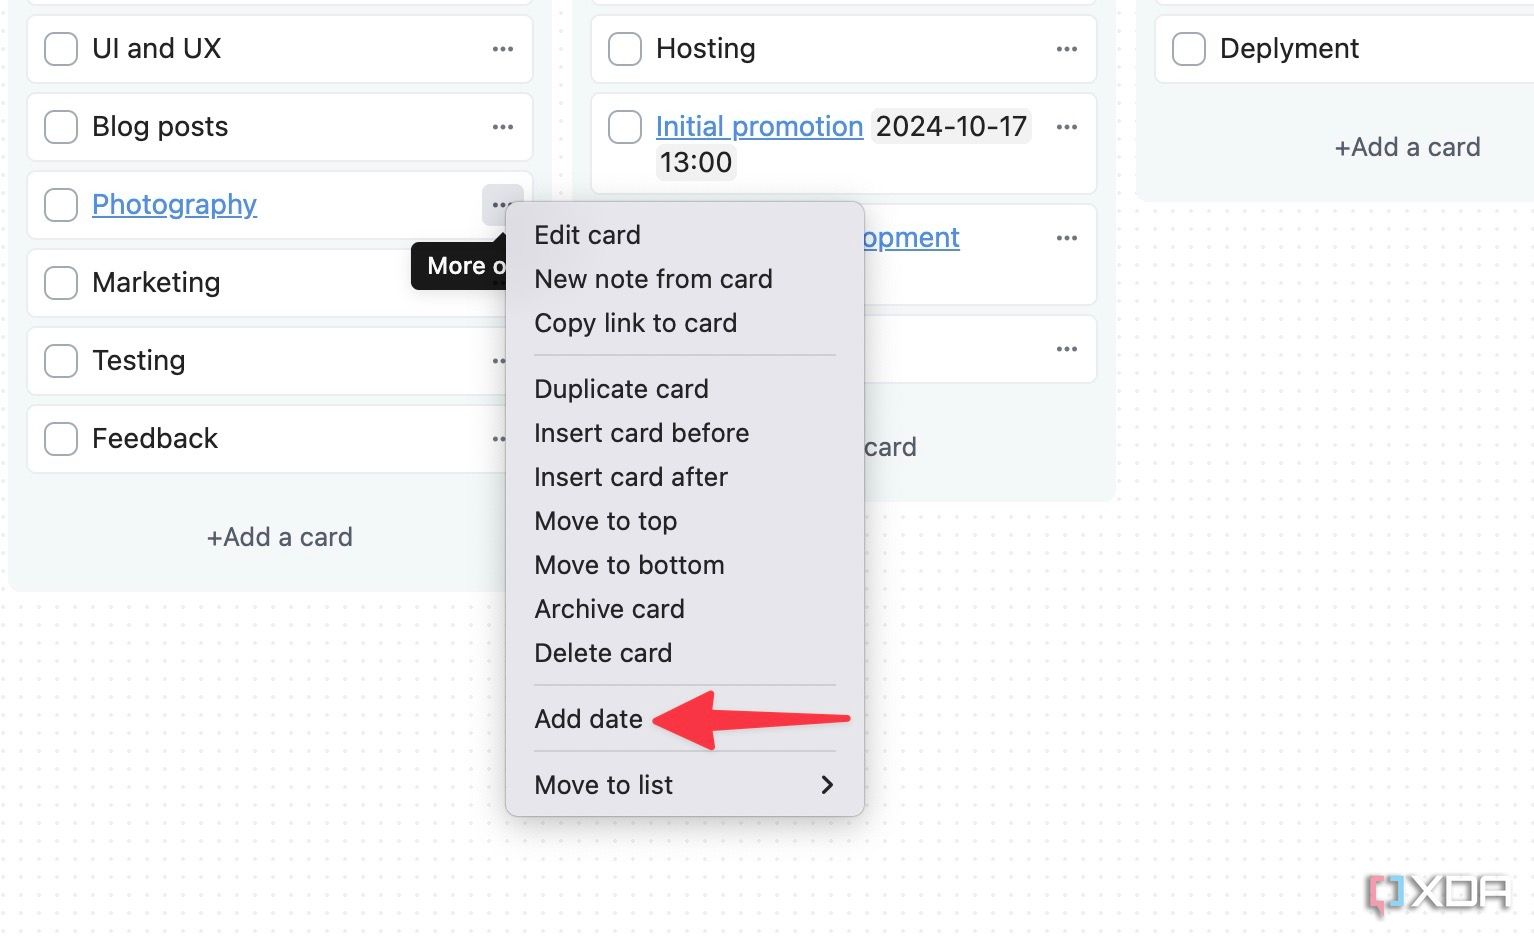
There is an option to insert a date and time to a relevant card, too. Click the three-dot menu beside a card and select Add date.
-
Once you add the date, open the same context menu and add time.
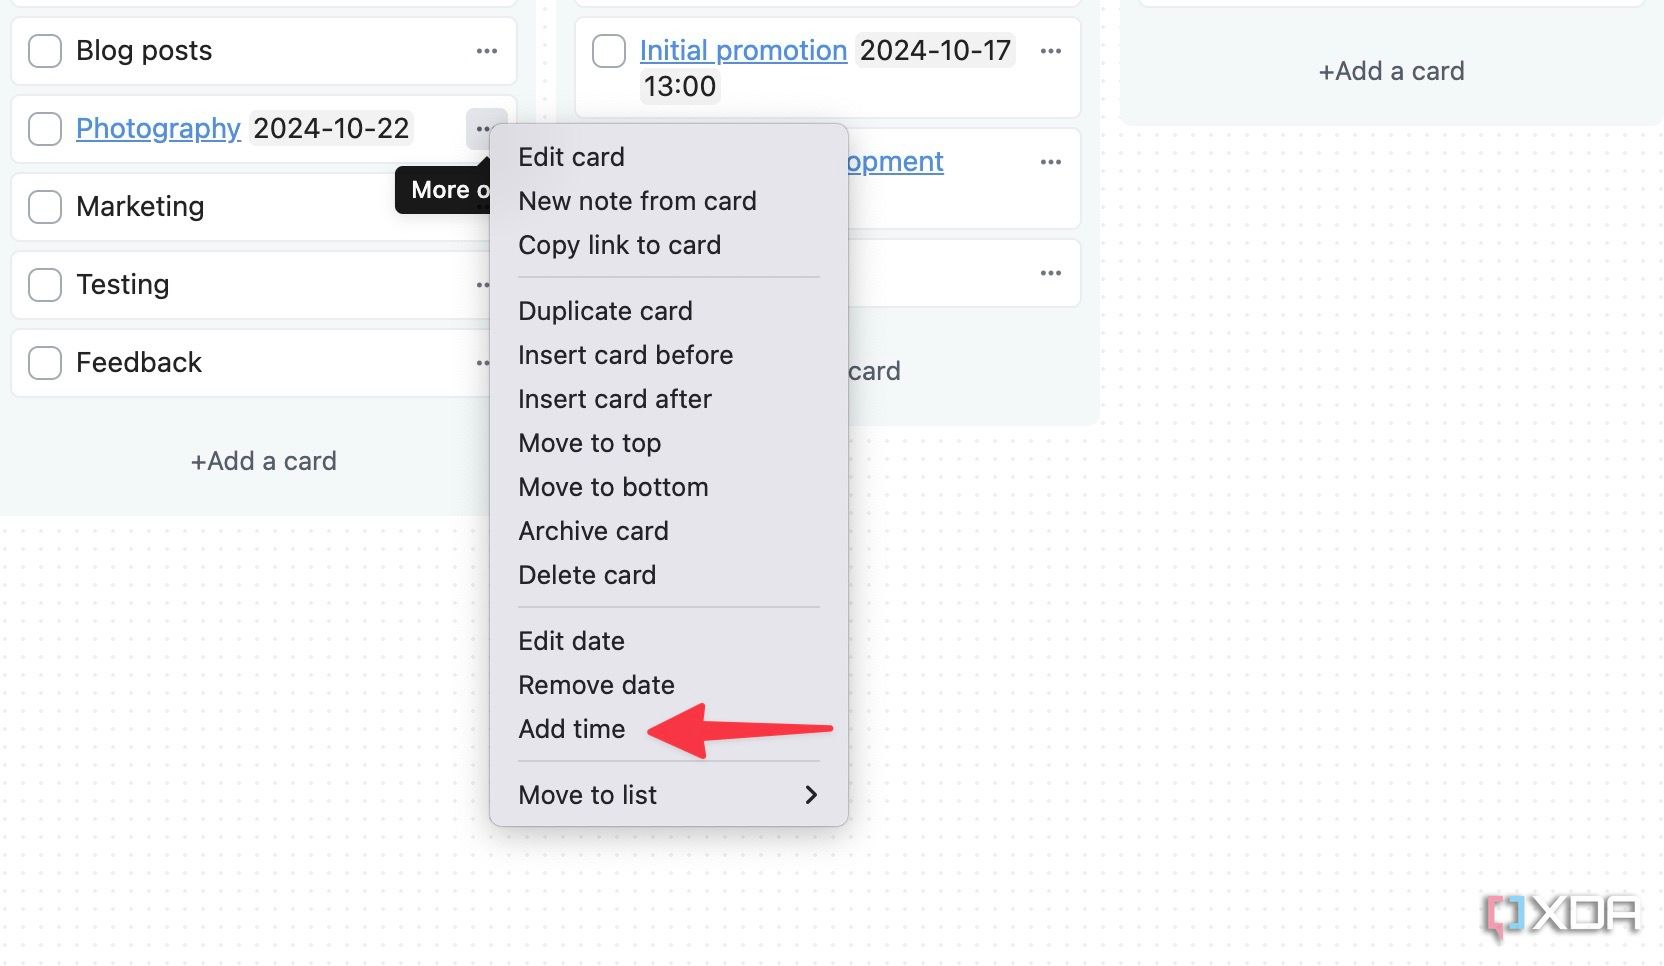


You can remove date and time, archive the card, move its position, and do a lot more from the same menu.
Change project view
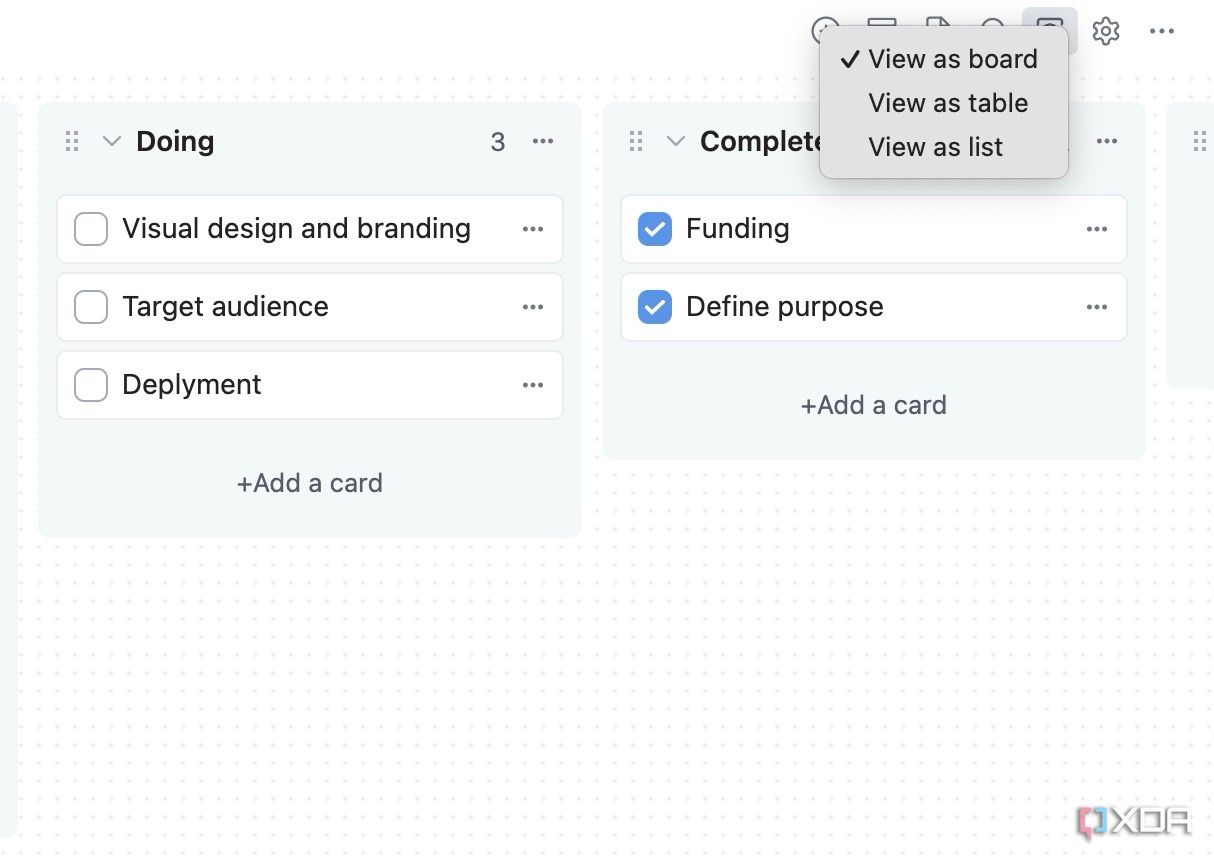
The plugin uses the board view by default. You can easily switch between table and list view using the steps below, if you decide you want to see the tasks differently.
- Open your Kanban board view in Obsidian.
-
Click the eye icon in the top-right corner and select View as table or View as list, whichever formatting change you intend to make. You could also open your board view as Markdown.
-
Click the three-dot menu in the top-right corner and select Open as Markdown.
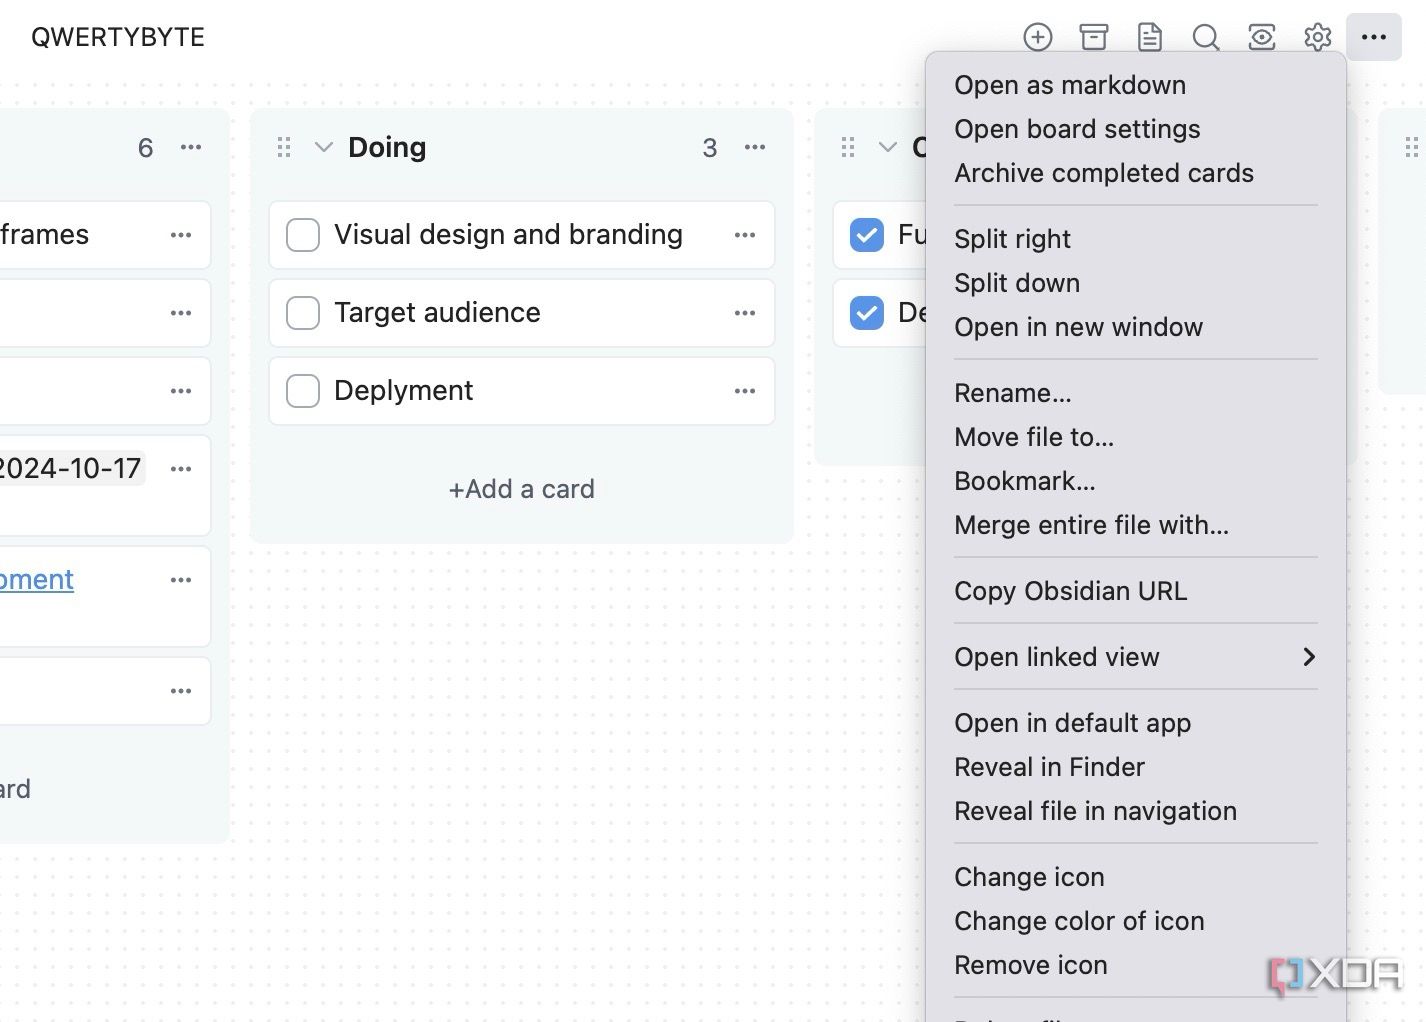


You can now check your columns as headers and add tasks as checklists under them.
Enable the checkbox beside each card
You can also enable a checkbox beside each card for better tracking.
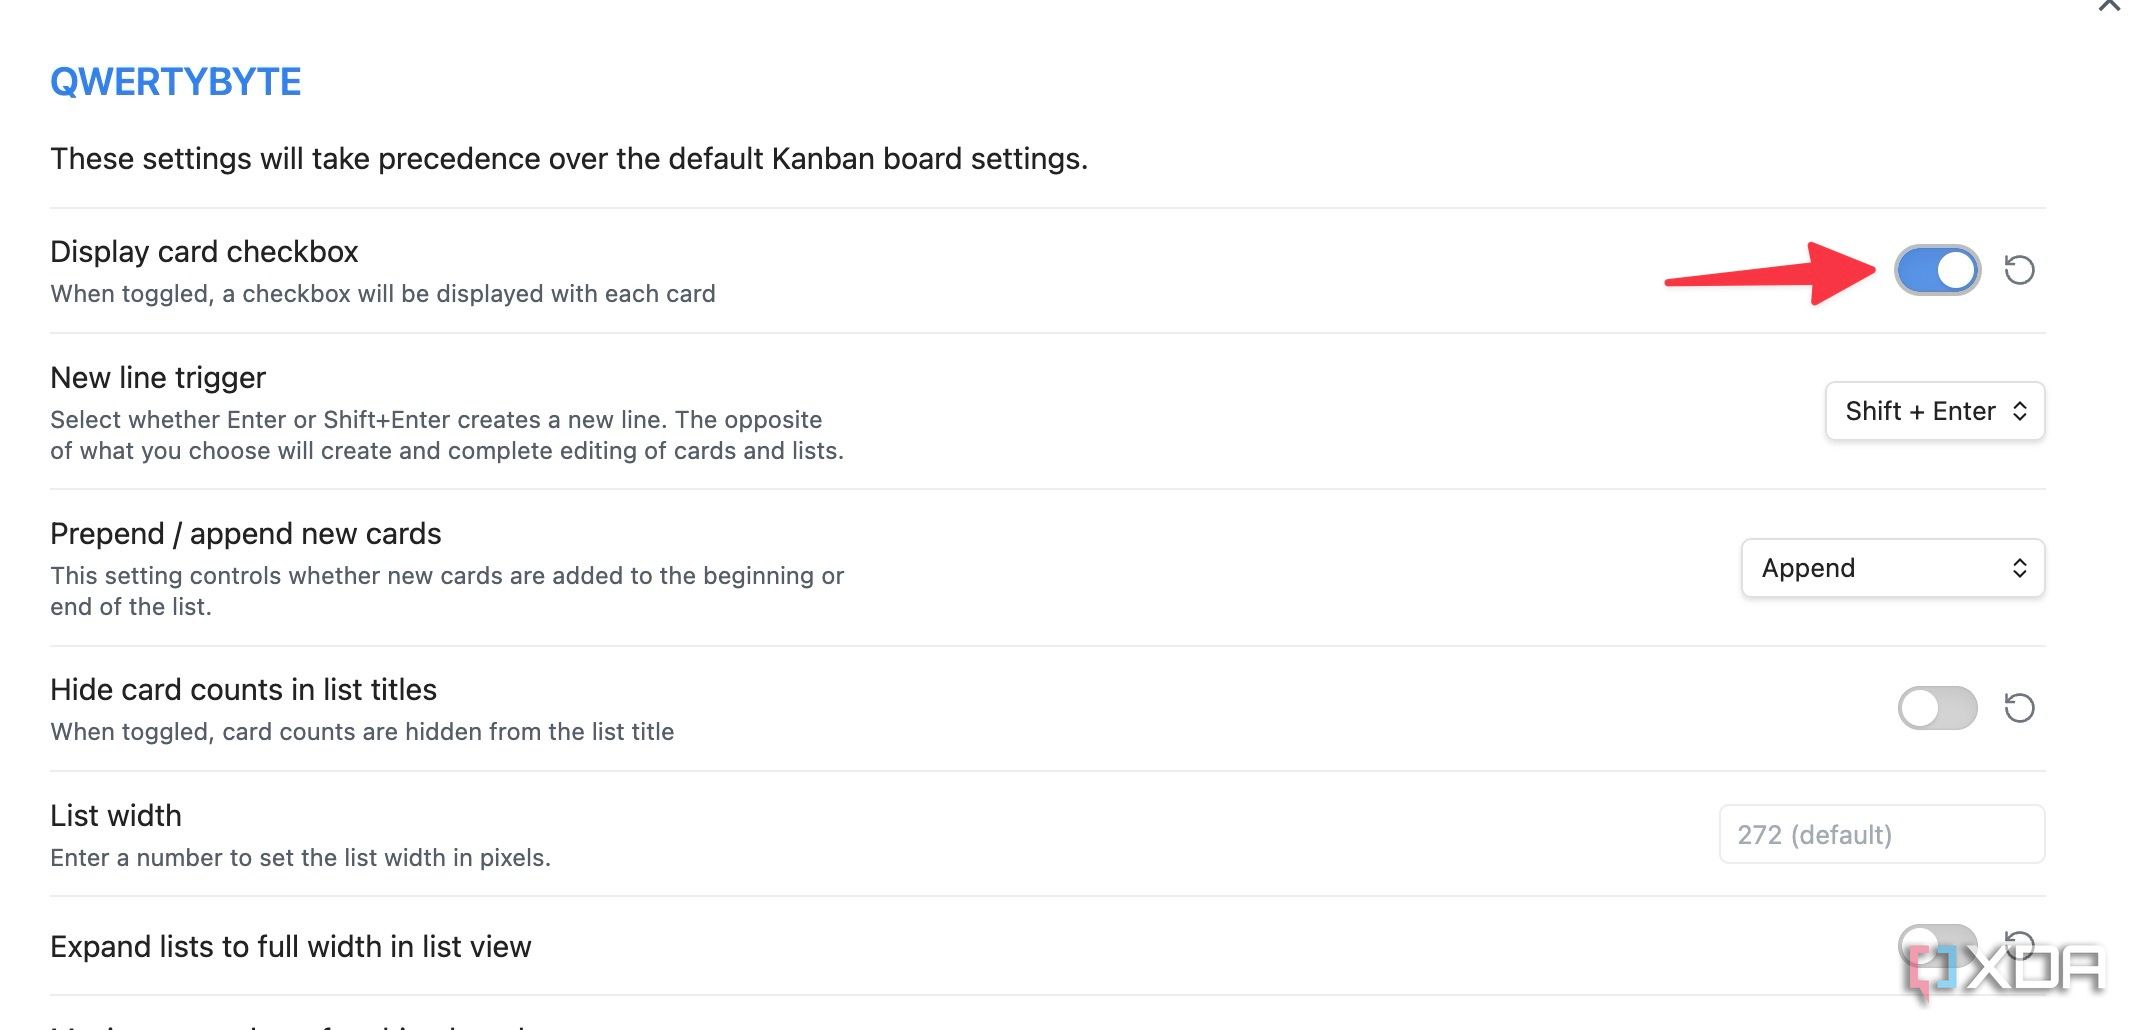
- Open your Kanban board in Obsidian and click the three-dot menu in the top-right corner. Select Open board settings.
-
Enable the Display card checkbox toggle.
- From now on, whenever you move your task card to the Completed column, it automatically adds a check mark to complete the card.

You can hide card counts in a list, change list width, assign a note template, pick a relevant folder for saving your new notes, tweak date and time settings, and much more here.
Assign an icon to a personal project
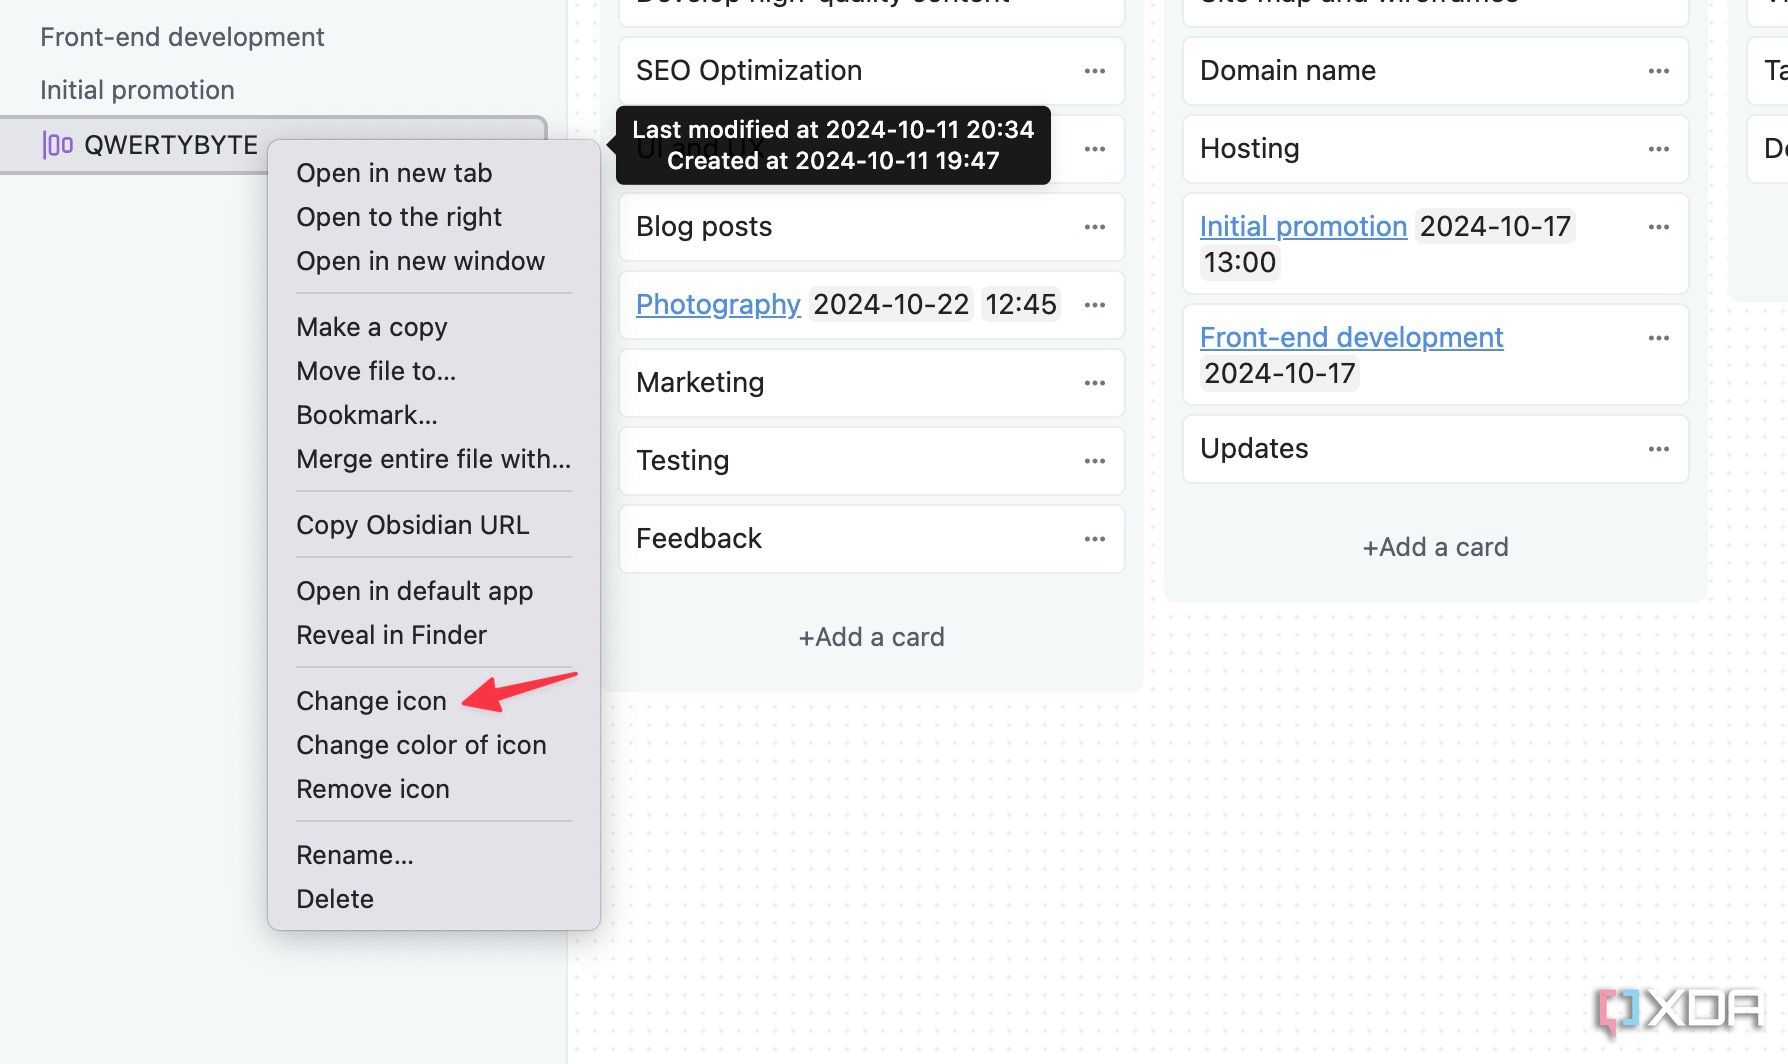
You should assign an icon to make your personal project stand out from other notes.
- Right-click on your project note.
-
Select Change icon.
-
Pick a relevant icon from the following menu.
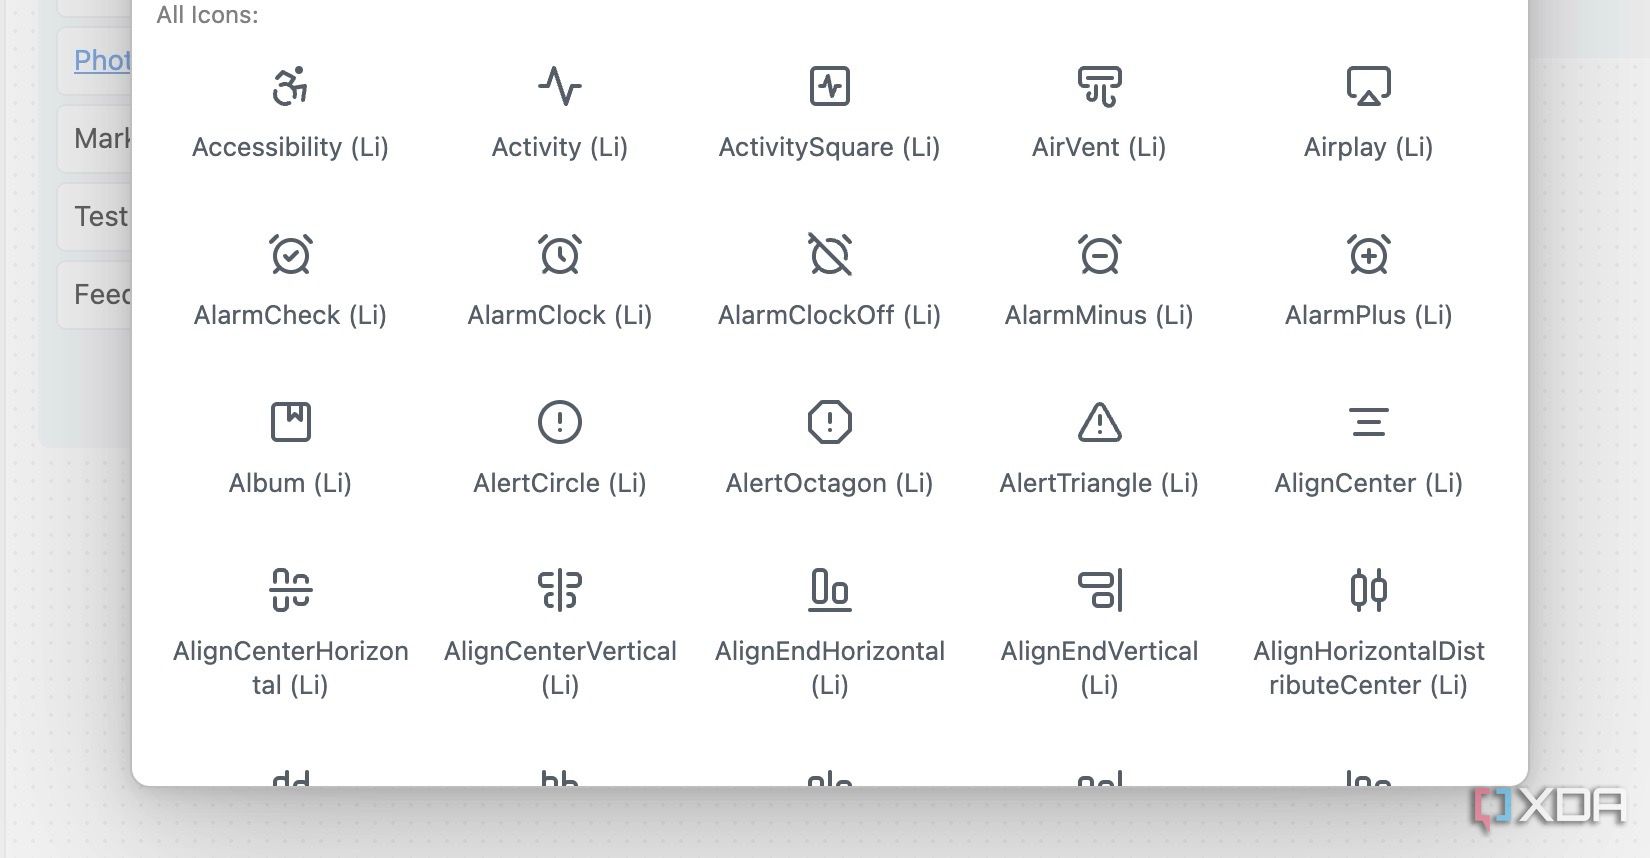


Perhaps just for fun.

Related
7 reasons Obsidian is better than Notion for productivity seekers
Obsidian is the productivity hack Notion can’t match
Tame project chaos
Whether you’re tracking your favorite books, planning a home renovation, designing a client website, scheduling an extended holiday, or any other project, follow these steps to monitor every detail meticulously in Obsidian. When you combine the Project plugin with typical Obsidian features like graph view, canvas, split view, and multi-tab functionality, you’ll quickly transition from feeling overwhelmed to being well-organized. What are you waiting for? Take it for a spin and create a space where your ideas can flourish and your projects will soar. If you are new to Obsidian, check out our dedicated guide to find the top tips and tricks.
")
