You bought a high-end Apple Silicon Mac with 64 GB of unified memory, expecting to run massive local AI models smoothly. Instead, you are hitting agonizingly slow text generation speeds, often dropping to one or two tokens per second, or getting out-of-memory errors. The bottleneck is not your processor, nor is it a lack of physical RAM. The real culprit is a hidden safety cap built into macOS that prevents your graphics processor (GPU) from using your system's full memory capacity.
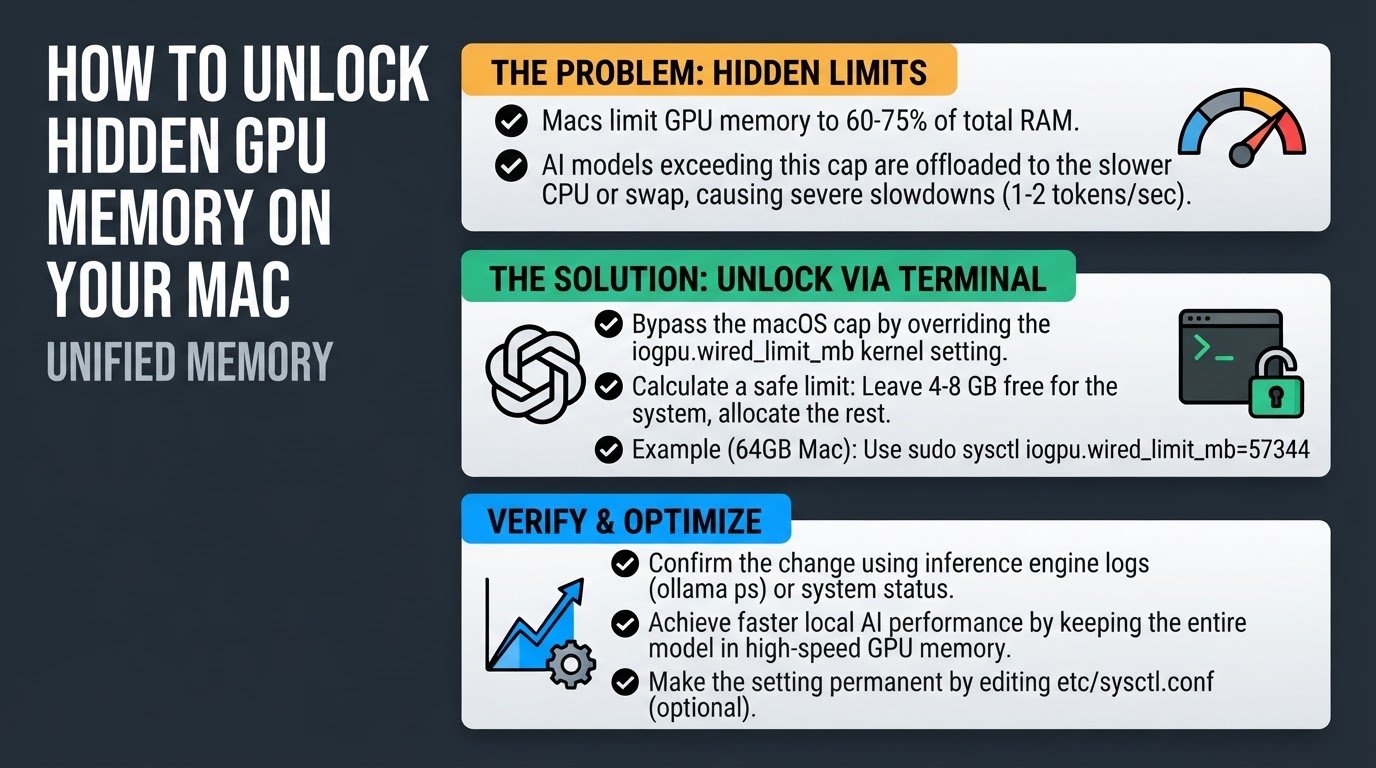
By default, macOS limits the GPU to roughly 60 to 75 percent of your total unified memory to keep the operating system running smoothly. When a local artificial intelligence model exceeds this hidden threshold, the system silently offloads parts of the model to the slower CPU or swaps data to your hard drive, causing performance to plummet. You can bypass this restriction and reclaim your Mac's full hardware potential by overriding a hidden kernel setting called iogpu.wired_limit_mb in your Terminal.
The consumer marketing surrounding Apple Silicon suggests that unified memory allows the graphics processor to access all system RAM for heavy workloads. While the hardware is physically capable of this, macOS hard codes a safety ceiling via the Metal API (Apple's graphics programming interface) using a property called recommendedMaxWorkingSetSize. This cap keeps a significant portion of your memory "unwired" so that everyday applications, browser tabs, and system services do not freeze up when you run intensive tasks.
When you load a large language model, the software must fit both the model weights (the actual AI file) and the KV cache (the working memory the AI uses to remember the context of your current conversation) into the GPU's allocated space. If the combined size of the model and the cache exceeds the default safety cap, tools like Ollama or llama.cpp will split the workload. This split forces your Mac to run part of the model on the CPU, causing token generation speeds to drop by up to 90 percent. Understanding this bottleneck is essential for anyone exploring the shift toward on-device SLMs vs cloud giants for local data privacy.
If you want to optimize your machine for local machine learning tasks, follow these steps to safely override the default memory allocation limits.
Step 1: Check your current GPU memory limit
Before changing any settings, you need to find out exactly how much memory your graphics processor is currently allowed to use.
- Open the Terminal application on your Mac by pressing Command + Space, typing Terminal, and pressing Enter.
- Type the following command and press Enter:
sysctl iogpu.wired_limit_mb - Read the output value displayed in the terminal window.
If the command returns a value of 0, your system is currently using the default macOS safety cap, which restricts the GPU to approximately 75 percent of your total physical RAM, according to Apple Developer Documentation.
Step 2: Calculate a safe override value
To prevent your Mac from crashing, you must never allocate 100 percent of your unified memory to the GPU. Doing so starves macOS of the essential memory it needs to run basic background processes, which will result in system lockups, frozen cursor screens, or sudden system restarts known as kernel panics.
A safe approach is to leave at least 4 GB to 8 GB of physical RAM completely free for macOS, allocating the remainder to your GPU.
To calculate your target value in megabytes:
- Deduct your reserved system memory from your total RAM. For example, on a 64 GB Mac, leaving 8 GB for the system leaves 56 GB for your GPU.
- Multiply that target gigabyte number by 1024 to convert it into megabytes.
- For a 56 GB allocation, the math is 56 multiplied by 1024, which equals 57344 MB.
You can apply this same calculation to other memory tiers, as detailed in community guides on ModelPiper. For a 32 GB Mac, reserving 6 GB for the system leaves 26 GB for the GPU, which calculates to 26624 MB.
Step 3: Temporarily raise the allocation ceiling
Once you have calculated your safe target number, you can apply the change directly to your active system. This runtime kernel adjustment takes effect immediately and does not require you to restart your computer.
- In your Terminal window, type the following command, replacing the number at the end with your calculated megabyte value:
sudo sysctl iogpu.wired_limit_mb=57344 - If you are running an older version of macOS and the command returns an error, use this alternative syntax instead:
sudo sysctl iogpu.wired_mem_limit=57344 - Press Enter. The Terminal will prompt you for your Mac's administrator password. Type your password and press Enter. Note that no characters will appear on the screen while you type your password.
This change is temporary. If your Mac restarts, the setting will revert to the default safety cap, making this a safe way to test your system's stability under heavy AI workloads without risking permanent configuration errors, as documented in developer override guides.
Step 4: Verify the change in your inference engine
With the new limit applied, you should verify that your AI software recognizes the additional memory.
- Launch your preferred local AI tool, such as Ollama.
- Open a new Terminal window and run the following command to check the status of active models:
ollama ps - Alternatively, you can view the active server logs for Ollama or llama.cpp. Look for the line containing
recommendedMaxWorkingSetSize. - Confirm that the value listed next to this property matches the new megabyte limit you set in Step 3.
If you notice a dramatic increase in generation speeds, your system is now successfully keeping the entire model inside the high-speed graphics memory instead of swapping data to your storage drive. For more troubleshooting tips on memory bottlenecks, you can read about how to make your slow local AI run faster.
Step 5: Make the memory allocation permanent
If your system remains stable during testing and you want to avoid typing the Terminal command every time you turn on your Mac, you can save this setting permanently.
- Open your Terminal and open the system configuration file using the nano text editor with administrative privileges:
sudo nano /etc/sysctl.conf - Type your administrator password when prompted.
- Use your arrow keys to navigate to the bottom of the file and add the following line:
iogpu.wired_limit_mb=57344 - Press Control + O, then press Enter to save the changes to the file.
- Press Control + X to exit the nano editor.
Your Mac will now automatically apply this custom GPU memory ceiling every time the operating system boots up. If you ever experience system instability or applications crashing unexpectedly after a macOS update, simply reopen this configuration file, delete the line you added, save the file, and restart your computer to restore the default factory limits.