

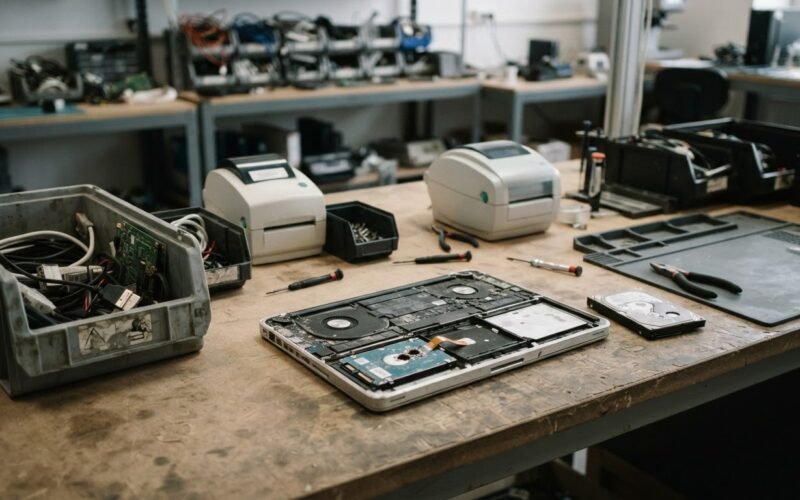
You have an old, dusty laptop sitting in your closet, and you finally want to get rid of it. You walk into a local retail store, spot the public e-waste recycling bin, and think about dropping it in. But a nagging worry stops you: Is it safe to recycle laptop with hard drive intact, or will an employee or dumpster diver steal your bank statements, passwords, and private photos?
The direct verdict is simple: No, retail drop-off bins are not secure transit points, and you should never drop off a working device without wiping or removing the drive first. While the downstream recycling partners eventually shred or wipe these drives, the retail store itself is merely a collection point. Your laptop will likely sit in an unsecured bin, a backroom, or a transit truck for days or weeks before reaching a certified facility. During this transit phase, your personal data is highly vulnerable to physical theft or rogue employees.
In fact, major retailers explicitly state in their terms of service that they are not liable for any data left on devices. To protect your e-waste data security, you must take data protection into your own hands before letting go of your machine.
Why Retail E-Waste Bins Are Not Secure
Many consumers believe the myth that dropping off a laptop at a retail recycling bin guarantees immediate and secure data destruction. The technical reality is much different. Retailers act as collection points, not data destruction facilities.
According to the Best Buy device privacy policy, customers are entirely responsible for removing all data before recycling. Similarly, Staples' trade-in terms release the company from any liability regarding data security. Once you drop your laptop into a bin, it enters a long logistics chain. It is handled by store employees, stored in backrooms, and loaded onto transit trucks before finally reaching a downstream certified recycler.
While those downstream partners eventually shred or wipe drives using strict NIST SP 800-88 standards, the transit phase leaves your data exposed. A curious employee or a physical thief targeting the backroom can easily access the device before it ever reaches the shredder.
Two Common Mistakes to Avoid
Before looking at the solutions, you must avoid two widespread mistakes that leave your personal information exposed:
- Dragging files to the Recycle Bin or Trash: This does not delete your data. It only deletes the file pointers, leaving the actual files fully salvageable on the storage platter or flash chips. If you are preparing a device for disposal, you might wonder if a standard reset is enough, similar to how people worry about whether deleted photos can be recovered after a factory reset on a mobile device.
- Dropping off a locked or dead laptop: A broken screen, a dead battery, or a strong login password does not protect your data. A bad actor can easily unscrew the bottom panel of your laptop, slide the hard drive out, plug it into a cheap USB adapter, and read all your files on another computer.
How to Secure Your Data Before Recycling
To ensure your private files never fall into the wrong hands, follow these practical steps before dropping your laptop off for recycling.
1. Physically Remove the Hard Drive or SSD
The absolute safest method is to remove the storage drive entirely and recycle only the remaining plastic and metal chassis.
- Turn off the laptop, unplug the power cable, and flip it over.
- Unscrew the bottom panel to access the internal components.
- Locate the storage drive: this will be a 2.5-inch rectangular drive (HDD) or a small, thin stick resembling a stick of gum (M.2 SSD).
- Disconnect the cable or unscrew the mounting bracket, slide the drive out, and keep it.
You can slide this drive into a cheap external enclosure to use as a portable backup drive, or physically destroy it yourself with a hammer or drill before throwing it away. This completely eliminates any risk of data theft during transit.
2. Verify Encryption is Active Before Wiping
If you choose to leave the drive inside the laptop, you must make sure it is encrypted before you perform a wipe. Encryption scrambles your data into unreadable code. Even if a thief pulls the drive out of the laptop, they cannot read your files without the unique decryption key.
- On Windows: Open the Start menu, type "BitLocker," and select "Manage BitLocker." Ensure that drive encryption is turned on.
- On macOS: Open System Settings, click "Privacy & Security," scroll down to "FileVault," and confirm it is active.
3. Perform a Secure Factory Reset with Data Erasure
Do not perform a standard quick reset, as this often leaves data recoverable. You must choose the deep cleaning options.
- On Windows: Go to Settings, select "System," click "Recovery," and choose "Reset this PC." Click on "Remove everything," then select "Change settings" and toggle "Clean data" to Yes. This setting actively overwrites the drive with random data, making file recovery nearly impossible.
- On macOS: Use the "Erase All Content and Settings" assistant. This instantly destroys the cryptographic keys of your encrypted drive, rendering all stored data permanently unreadable. This is a critical step, especially if you have ever accessed sensitive work files or personal accounts on the machine, which is a common concern for remote workers managing work laptop privacy.
4. Use Dedicated Drive Wiping Software
For older mechanical hard drives (HDDs), a standard factory reset may still leave traces of data.
- Download a free, trusted tool like DBAN (Darik's Boot and Nuke) to a USB drive. Boot your computer from the USB drive to completely overwrite the entire hard drive multiple times.
- For modern Solid State Drives (SSDs), do not use DBAN, as it can wear out the drive. Instead, download the proprietary utility software from your SSD manufacturer (such as Samsung Magician or SanDisk Dashboard) and execute the "Secure Erase" command. This sends a voltage spike to all NAND flash cells, wiping them clean instantly.
5. Use a Certified R2 or e-Stewards Recycler
If you must recycle the hard drive itself and want to ensure it is destroyed safely, bypass the retail drop-off bins entirely. Instead, take your device directly to a facility certified to R2 (Responsible Recycling) or e-Stewards standards.
These certified facilities, unlike standard retail stores, maintain a strict, documented chain of custody. When you hand over your device, they will process the drive in a secure area and can provide you with an official Certificate of Data Destruction once the drive has been physically shredded or magnetically degaussed.
